
Kits#
Kits are Gravwell’s way of bundling up a lot of related items (dashboards, queries, scheduled searches, autoextractors) for easy installation on other systems. A kit might contain tools for analyzing Netflow data, or for monitoring a homebrewing setup. Gravwell Inc. provides pre-built kits for common use cases, but users can also build their own kits from within the Gravwell UI.
What’s in a Kit#
There are many components which make up a kit. First, there are the contents of the kit, which fall into 2 categories:
Items: Regular Gravwell components such as dashboards, scheduled searches, macros, actionables, etc.
Configuration Macros: These are specialized macros which the kit uses to configure itself, which can allow greater flexibility in e.g. choices of tags used. For instance, rather than using
tag=netflowin all queries, a Netflow kit can saytag=$NETFLOW_KIT_TAG, then define a configuration macro named NETFLOW_KIT_TAG. At installation time, the kit prompts the user for which tag or tags contain Netflow records.
There are a few other things which help identify a kit that are useful to keep in mind:
ID: Identifies the kit. Gravwell uses namespaces similar to Android applications, e.g. “io.gravwell.netflowv5”.
Version: Kits may be updated over time, and the version number tracks this so Gravwell can automatically notify of new kit versions.
Name: A user-friendly name for the kit, e.g. “Netflow v5”.
Description: A detailed description of what the kit does.
MinVersion/MaxVersion: Some kits require specific Gravwell features; to ensure those features are available, these fields specify which Gravwell versions are compatible with the kit.
Dependencies: Kits can depend on other kits, like packages in a Linux distribution. Gravwell’s Netflow v5 kit depends on the Network Enrichment kit, for example. Dependencies are automatically installed along with the kit.
Browsing Installed Kits#
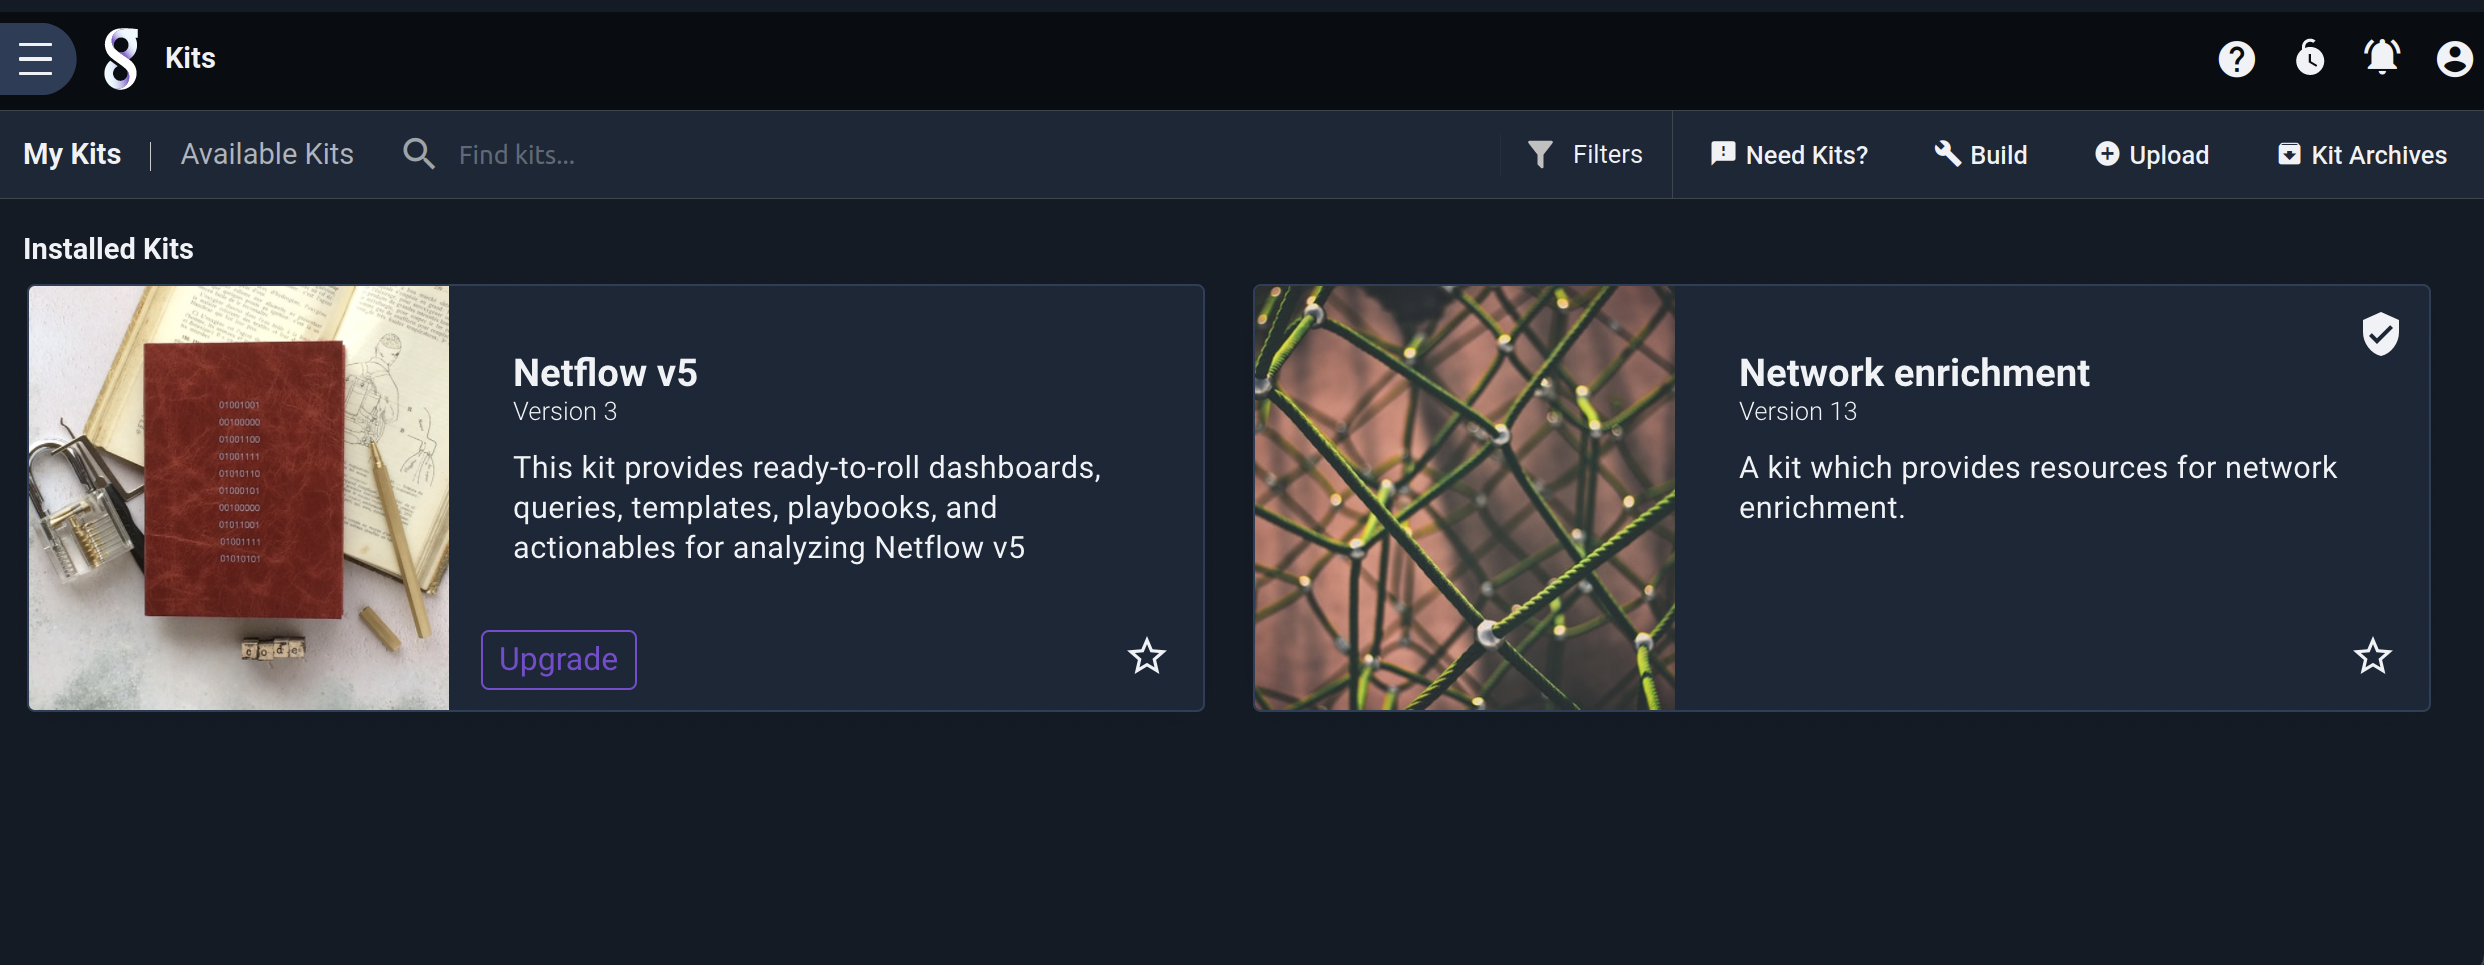
Kits are managed through the Kits page, located in the main menu. When you load the kits page, you will first see a list of installed kits if there are any. If there are no kits staged or deployed, the available kits will be displayed instead. In the image below, we see two installed kits:
Clicking one of the kits will put you into the context of the selected kit and display the kit’s contents:

The UI is now in the kit’s context, meaning it will only show that kit’s contents until you leave the context. For example, browsing to the Resources page from the main menu will show only the resources included with that particular kit:
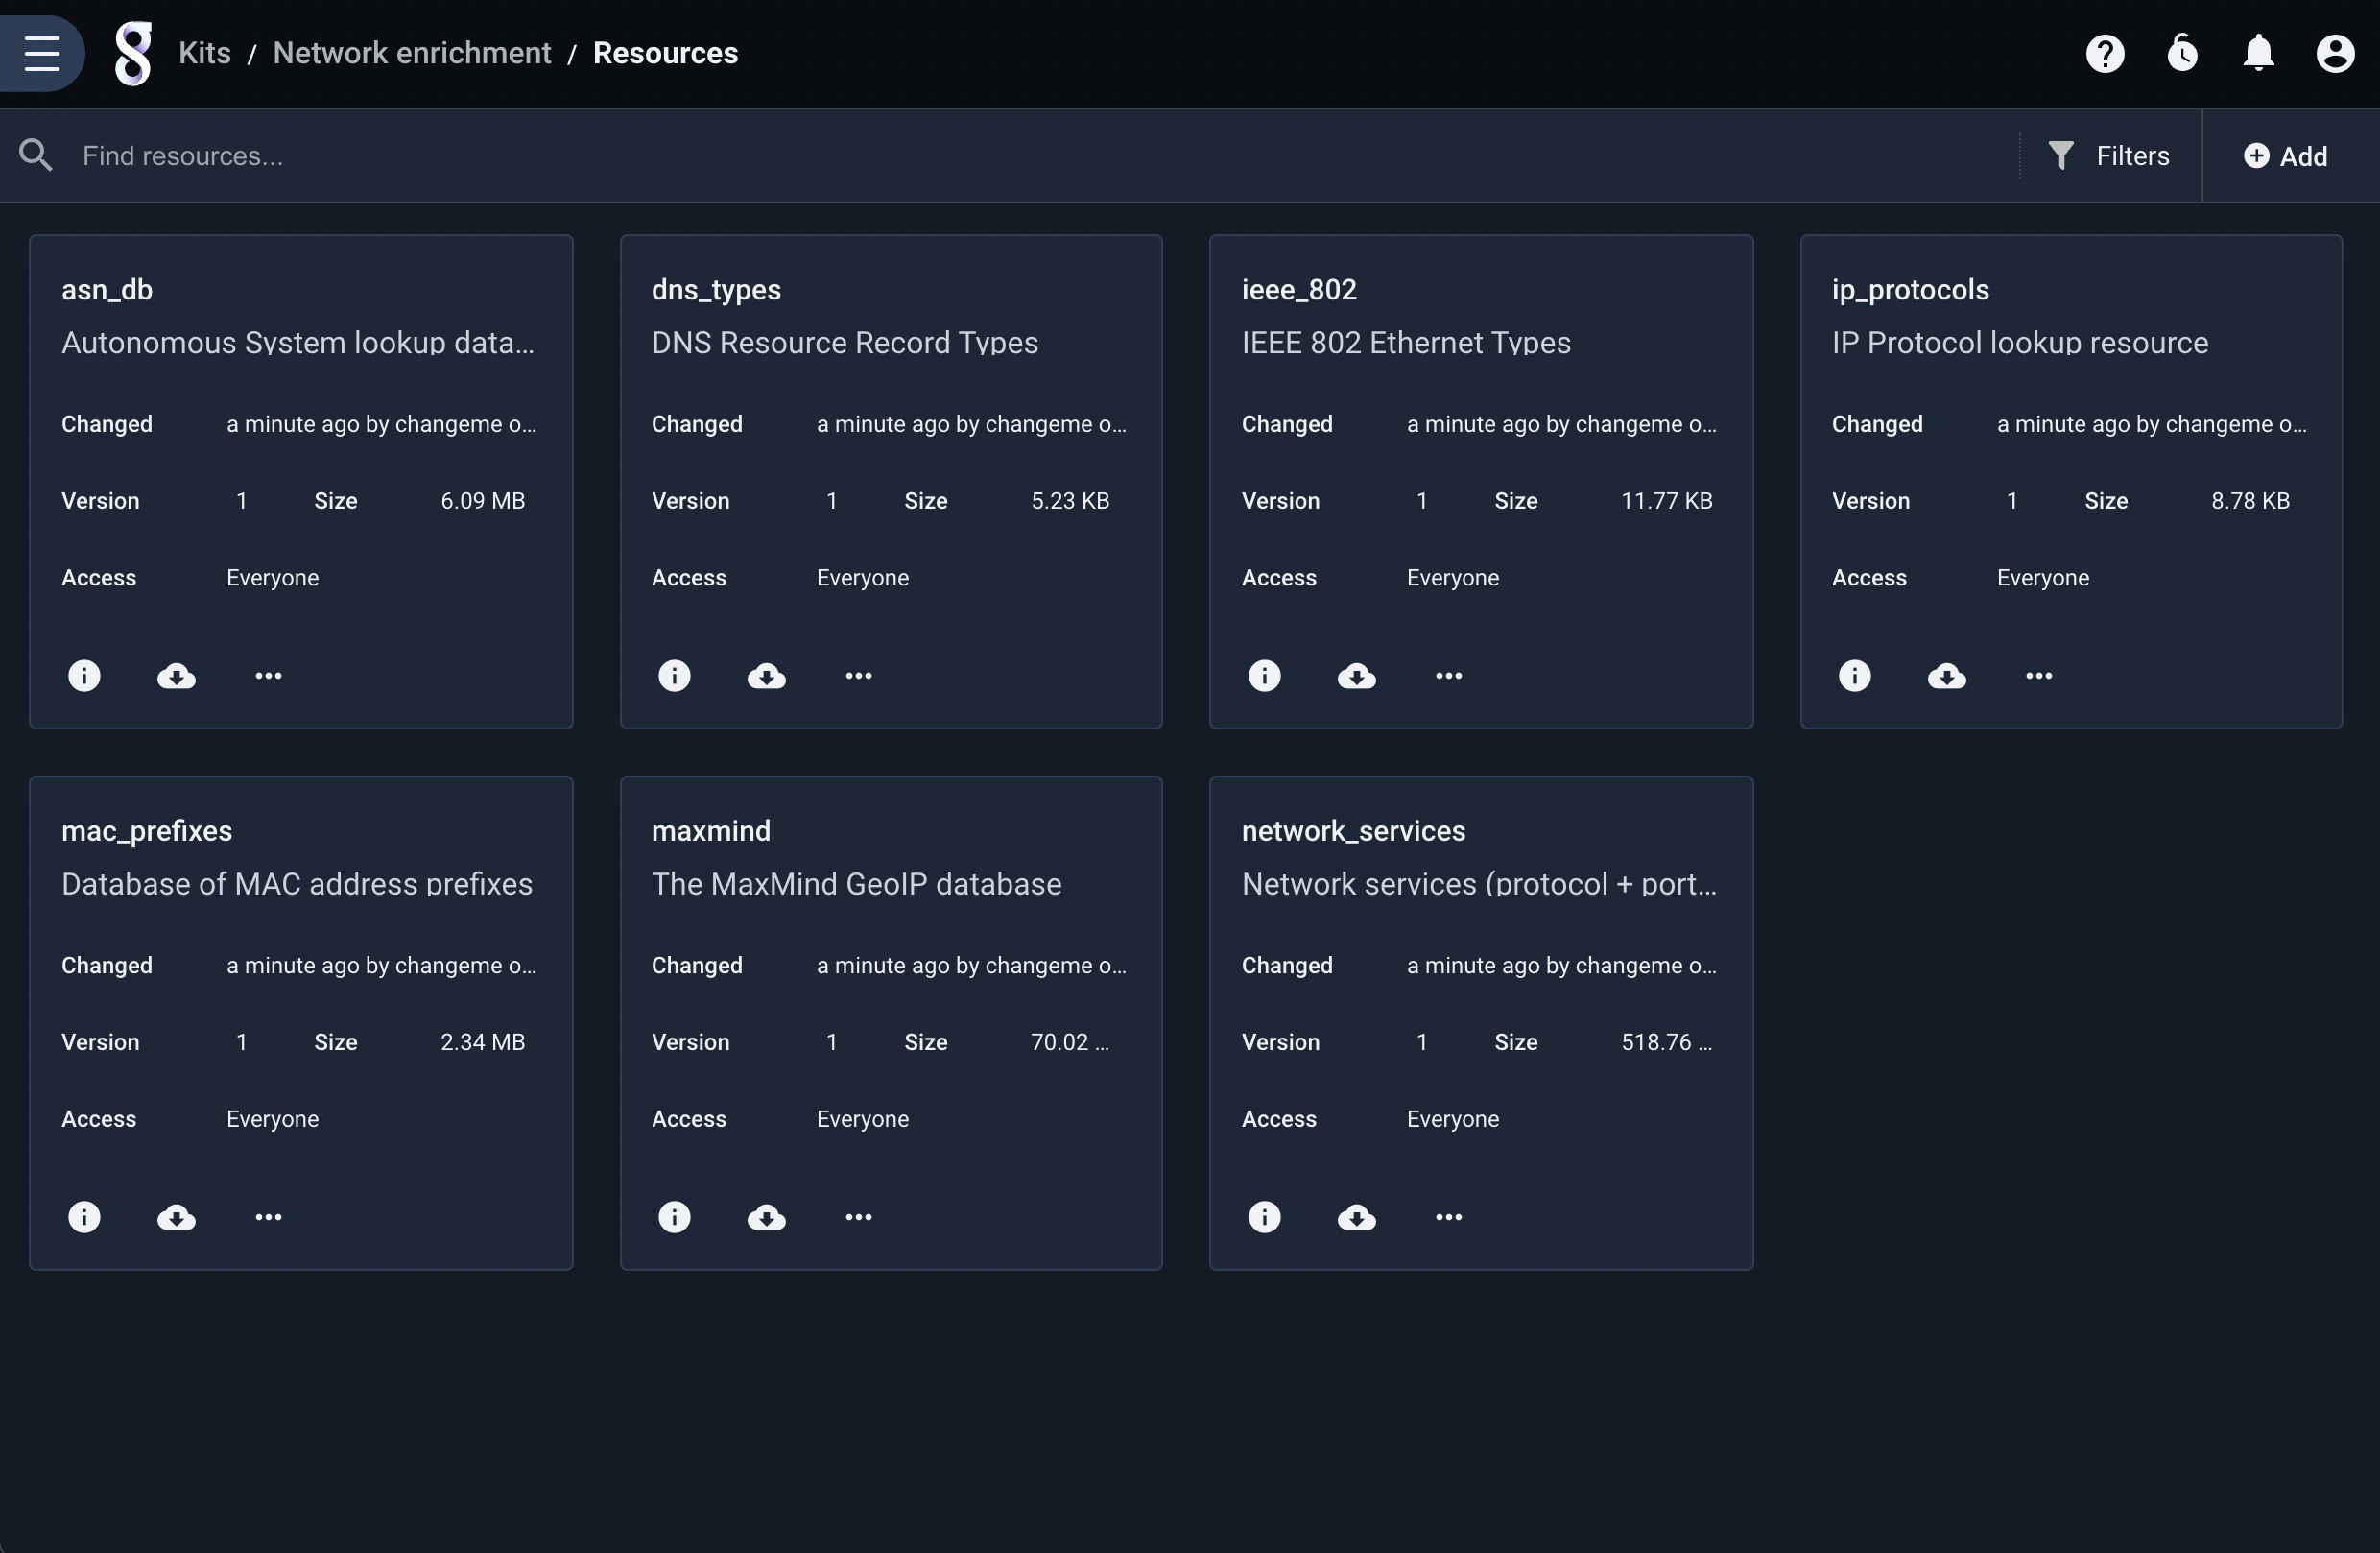
Note the text “Kits / Network enrichment / Resources” at the top of the page. This indicates that we are inside that particular kit. To leave the kit context, open the main menu and navigate back to “All Gravwell” or click the Gravwell logo next to the main menu.
Installing Kits#
To find and install kits, click the “Available Kits” tab in the upper-right corner of the main kits page.
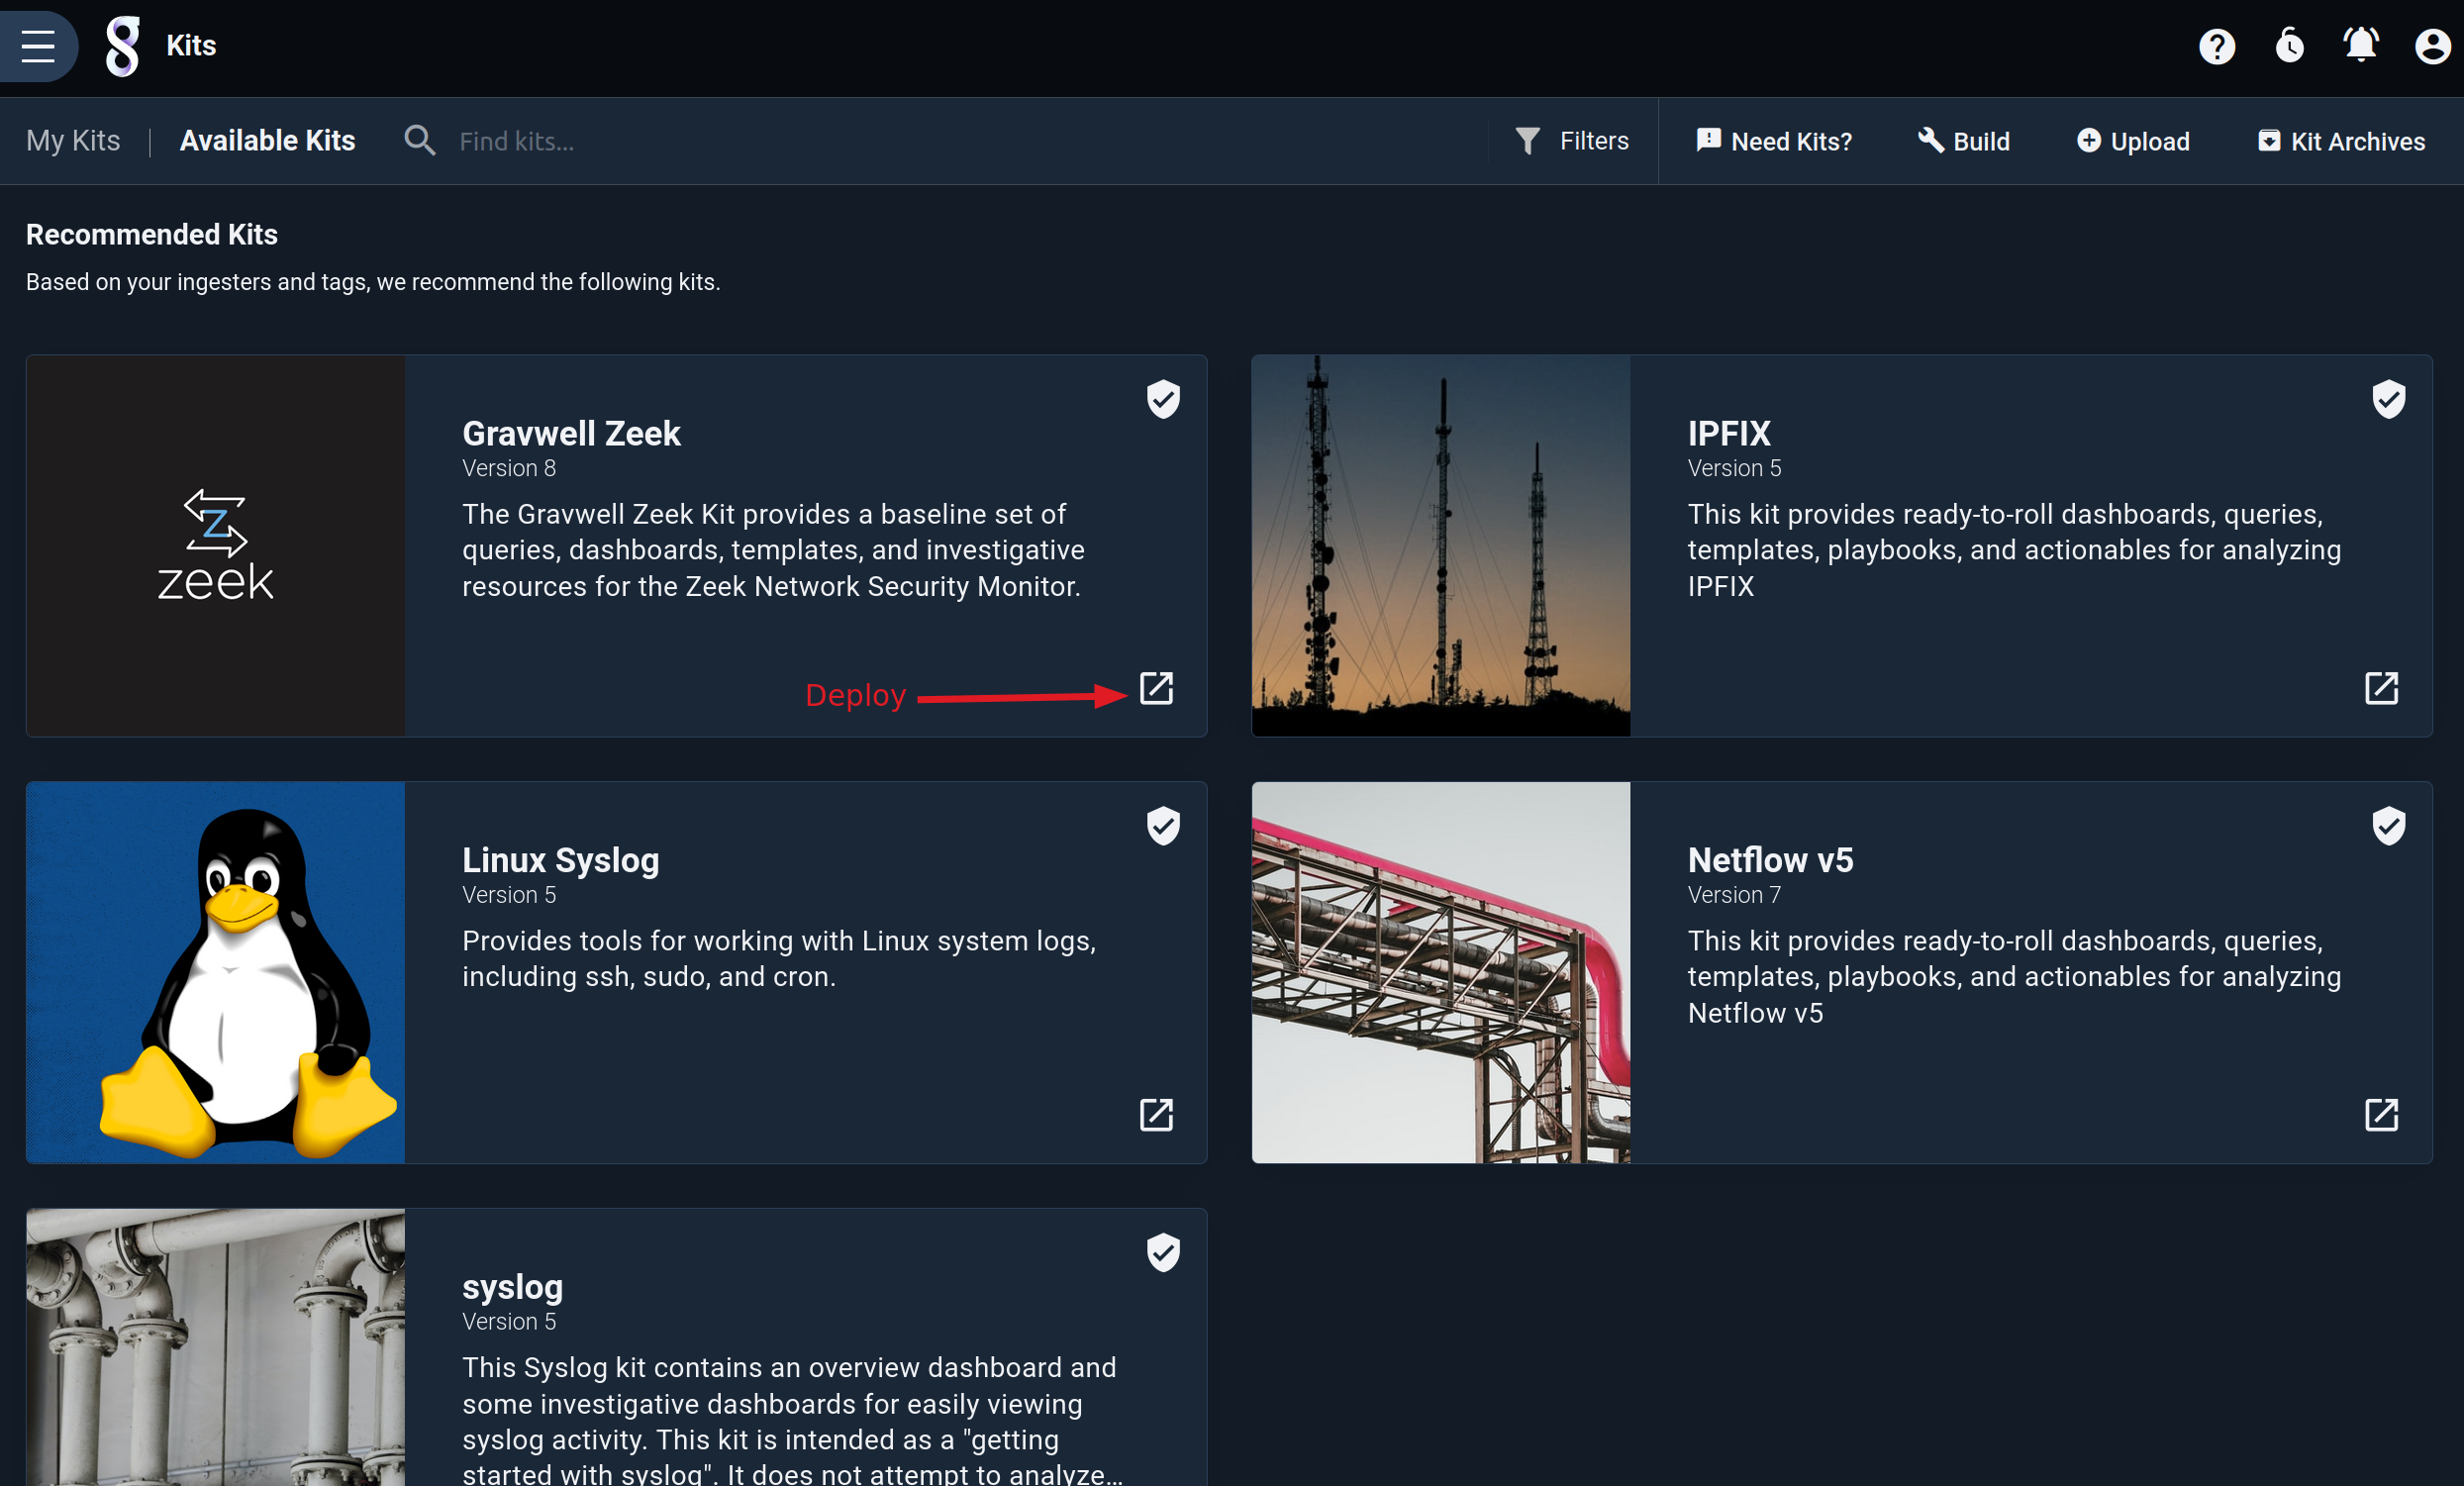
You can click on the kit to view details and learn more about a given kit. Once you’ve decided on a kit to install, click the “Deploy” button. The system will pull the kit, then pop up a wizard for installation. In the screenshot below, we have selected the IPFIX kit for installation. The first page shows a list of items contained in the kit:
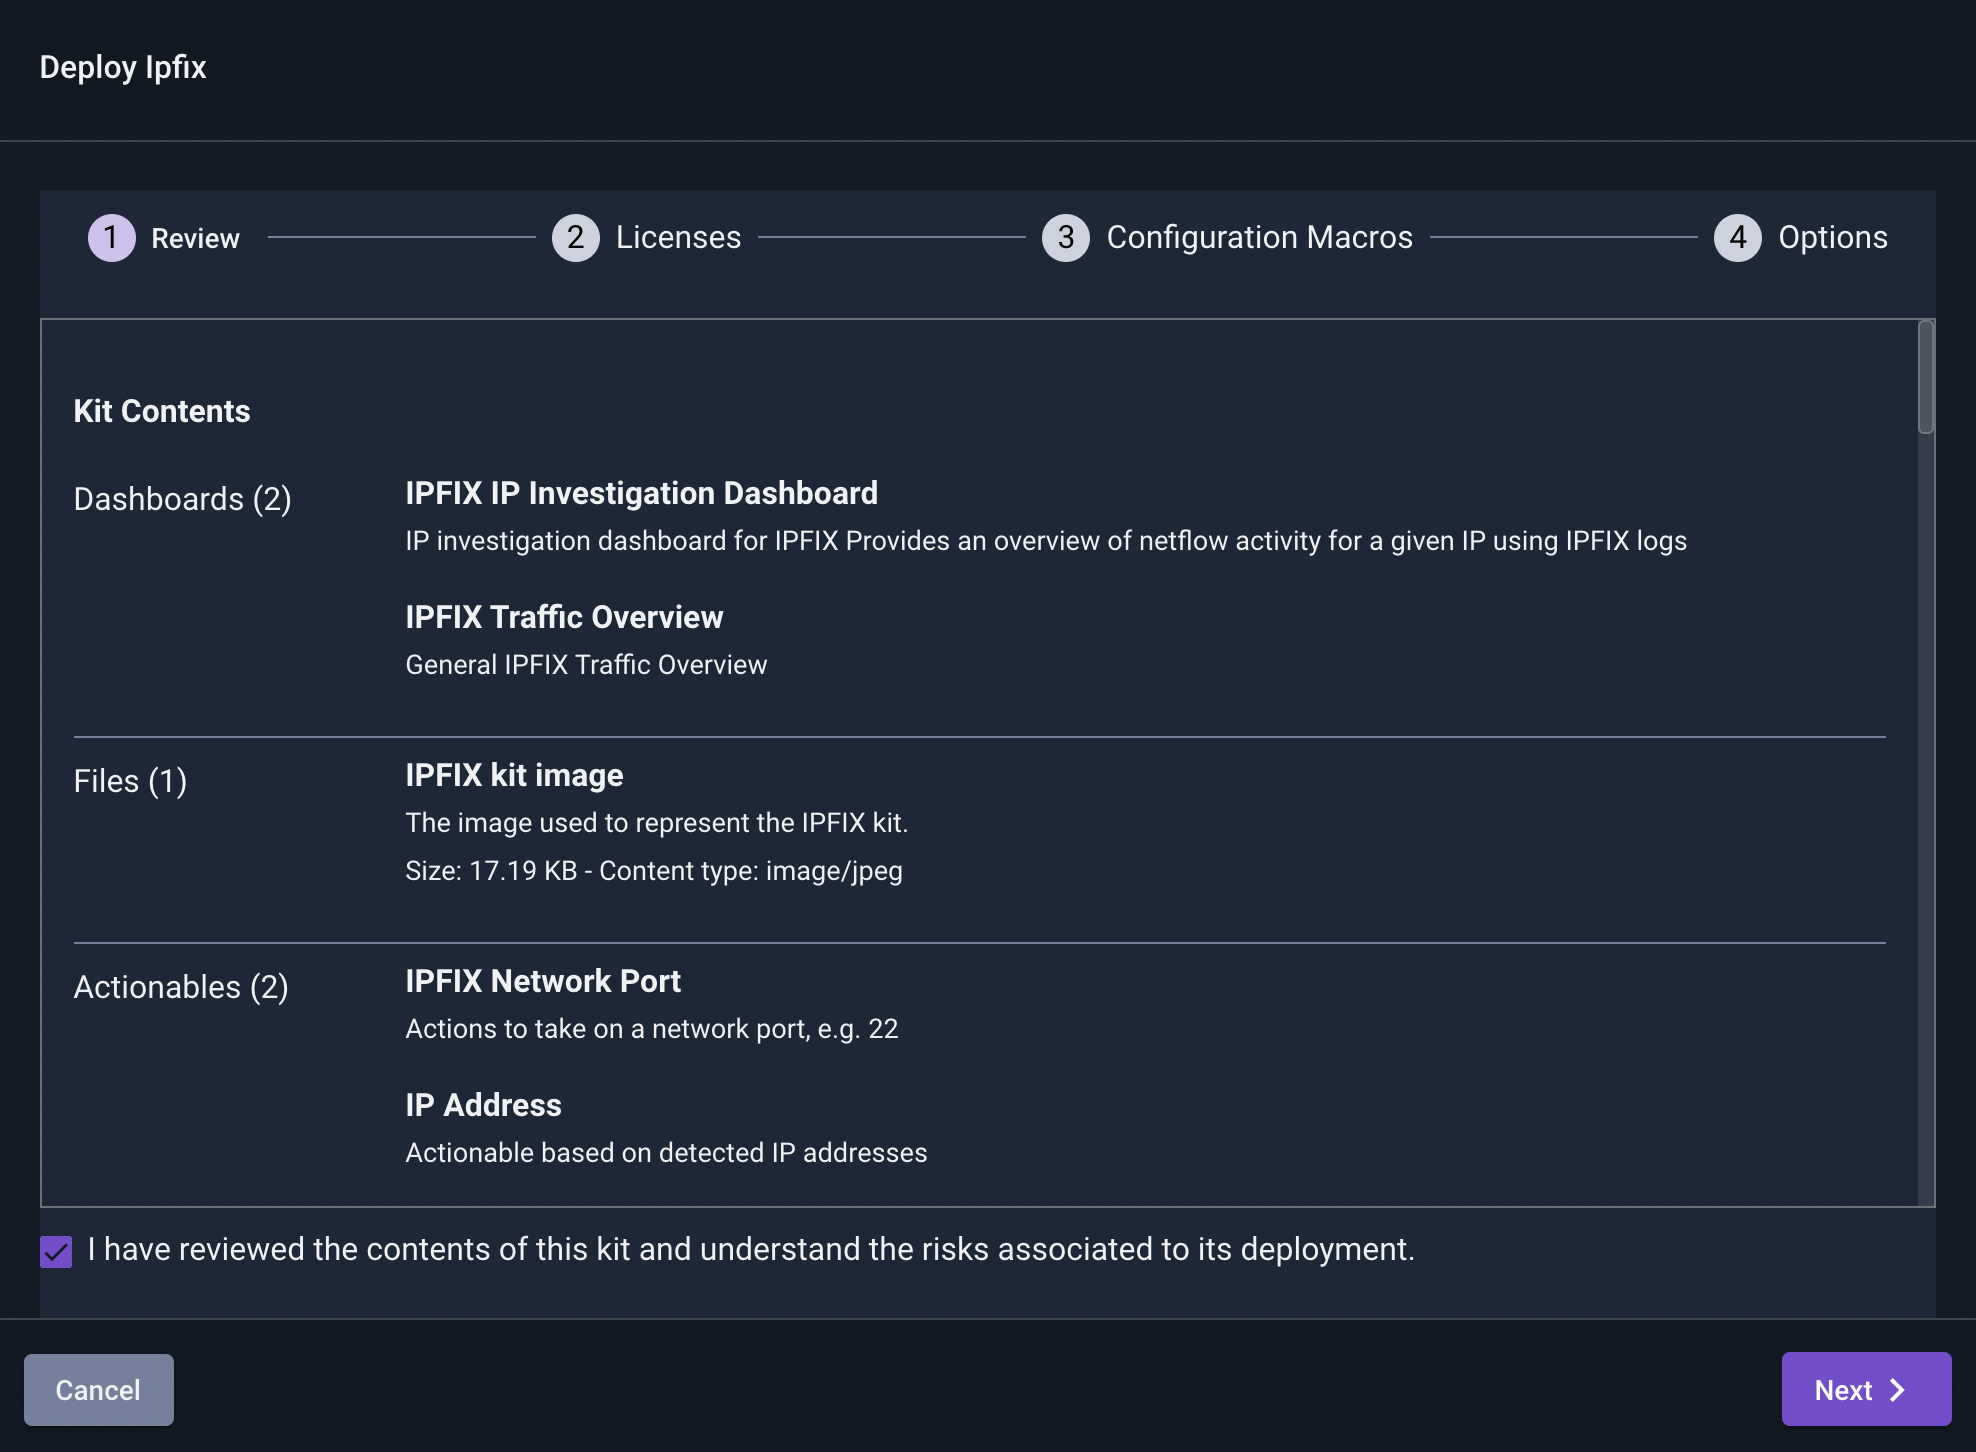
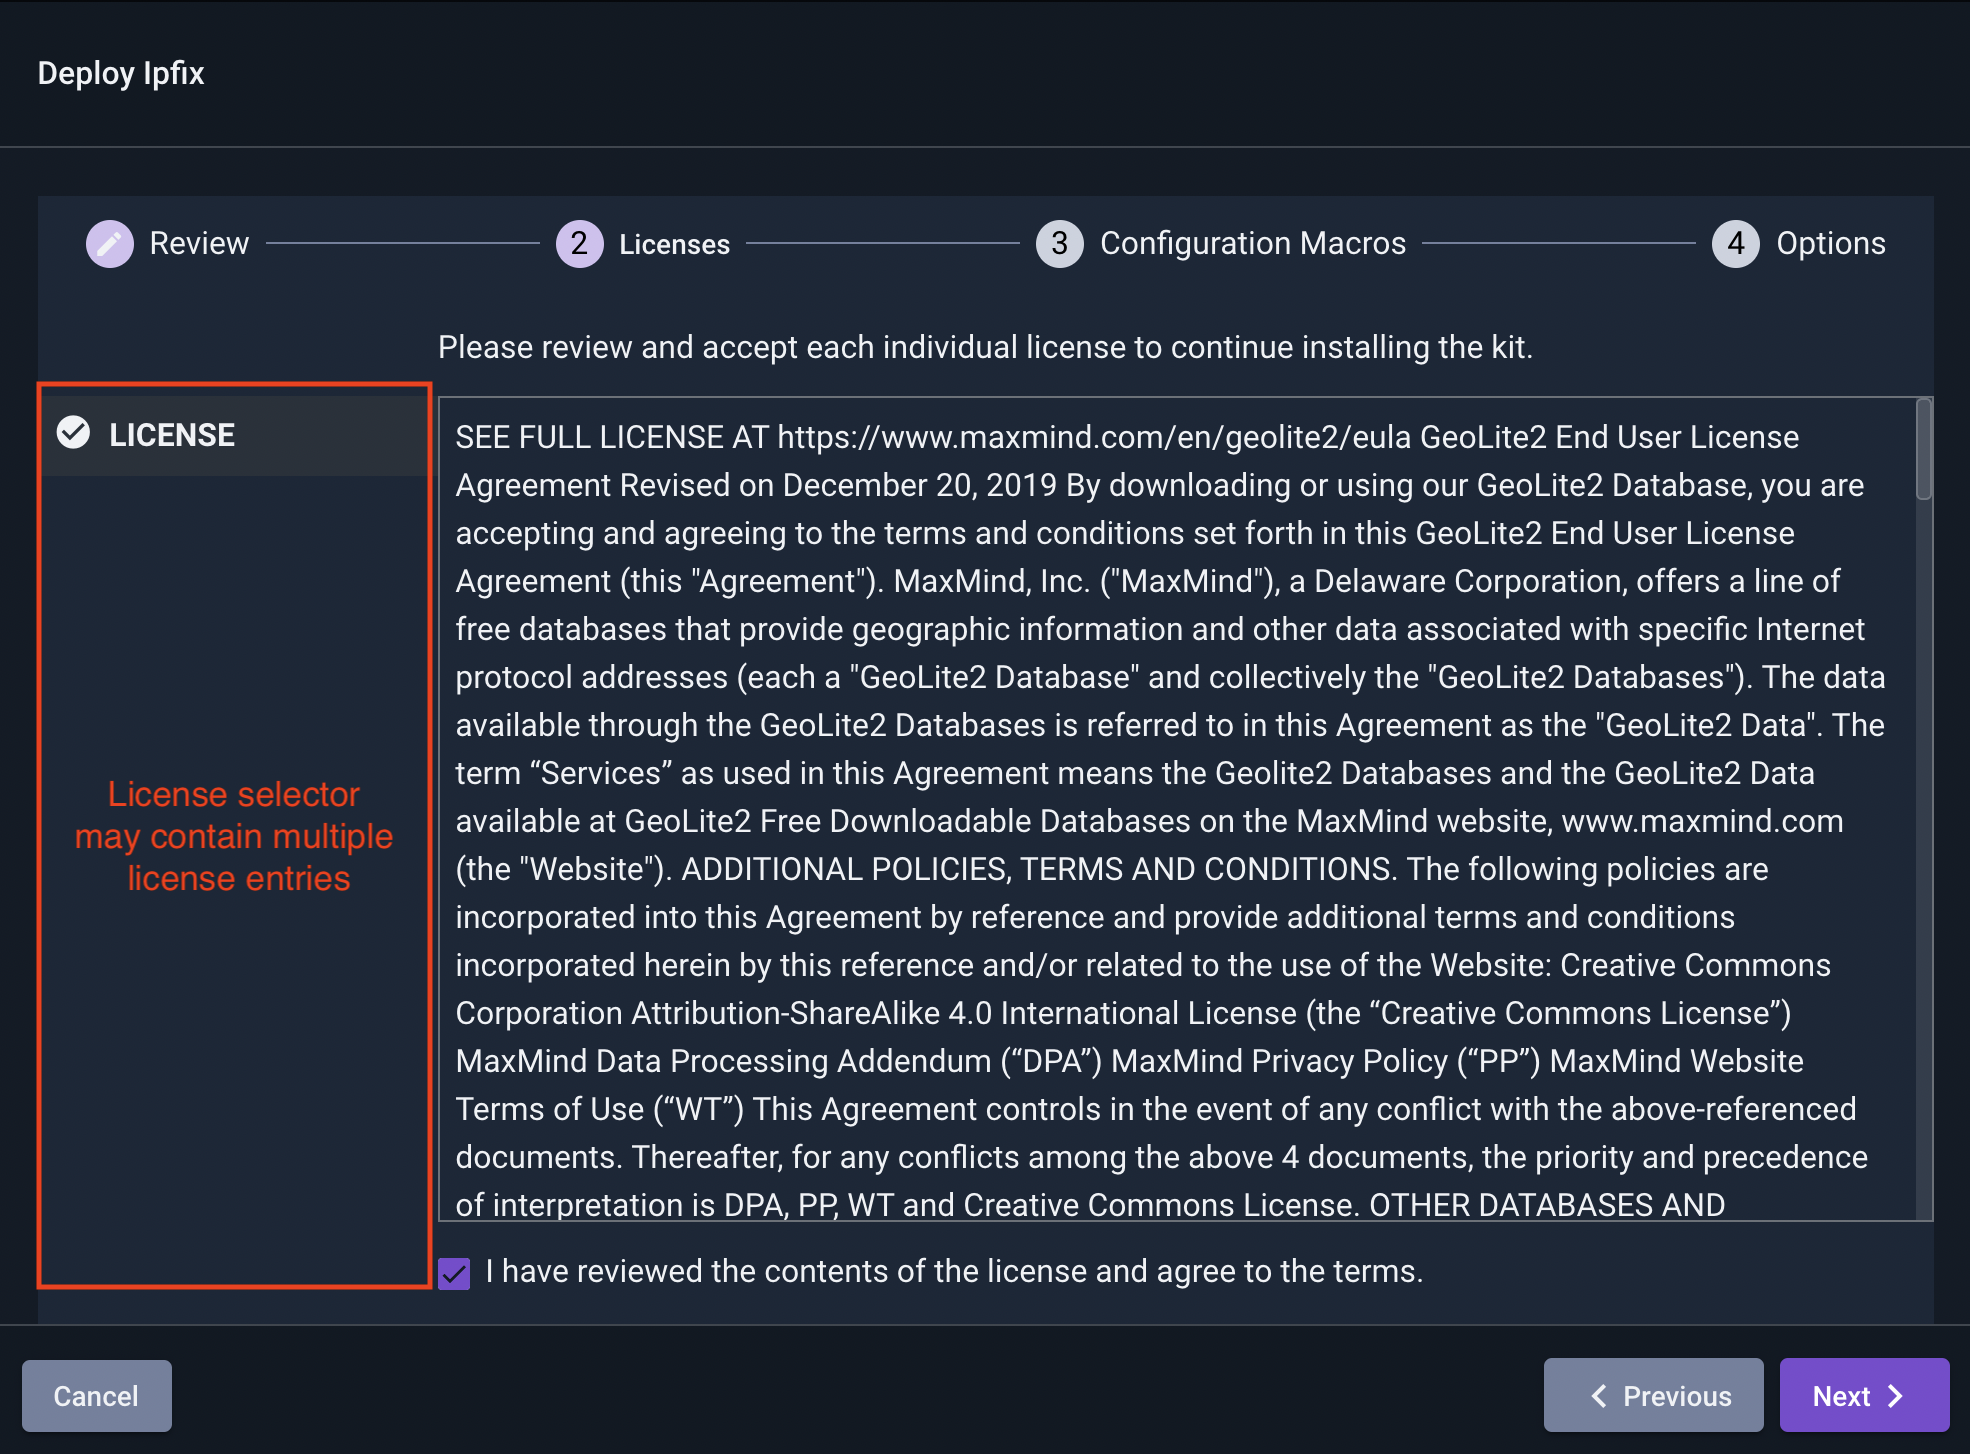
After reviewing the contents, click the checkbox and select the Next button. The wizard will then display any licenses packaged with the kit; note that if there are multiple licenses, you will have to select each one individually from the list on the left and click each checkbox before continuing.
Next, the wizard will prompt for Configuration Macros, if any are defined by the kit. A configuration macro allows install-time configuration of the queries which are shipped by the kit; these will typically include a default value but also provide a description to help you figure out what to enter. In this screenshot, it needs to know which tag contains IPFIX records; because we intend to use the “ipfix” tag, we can leave the default value alone.

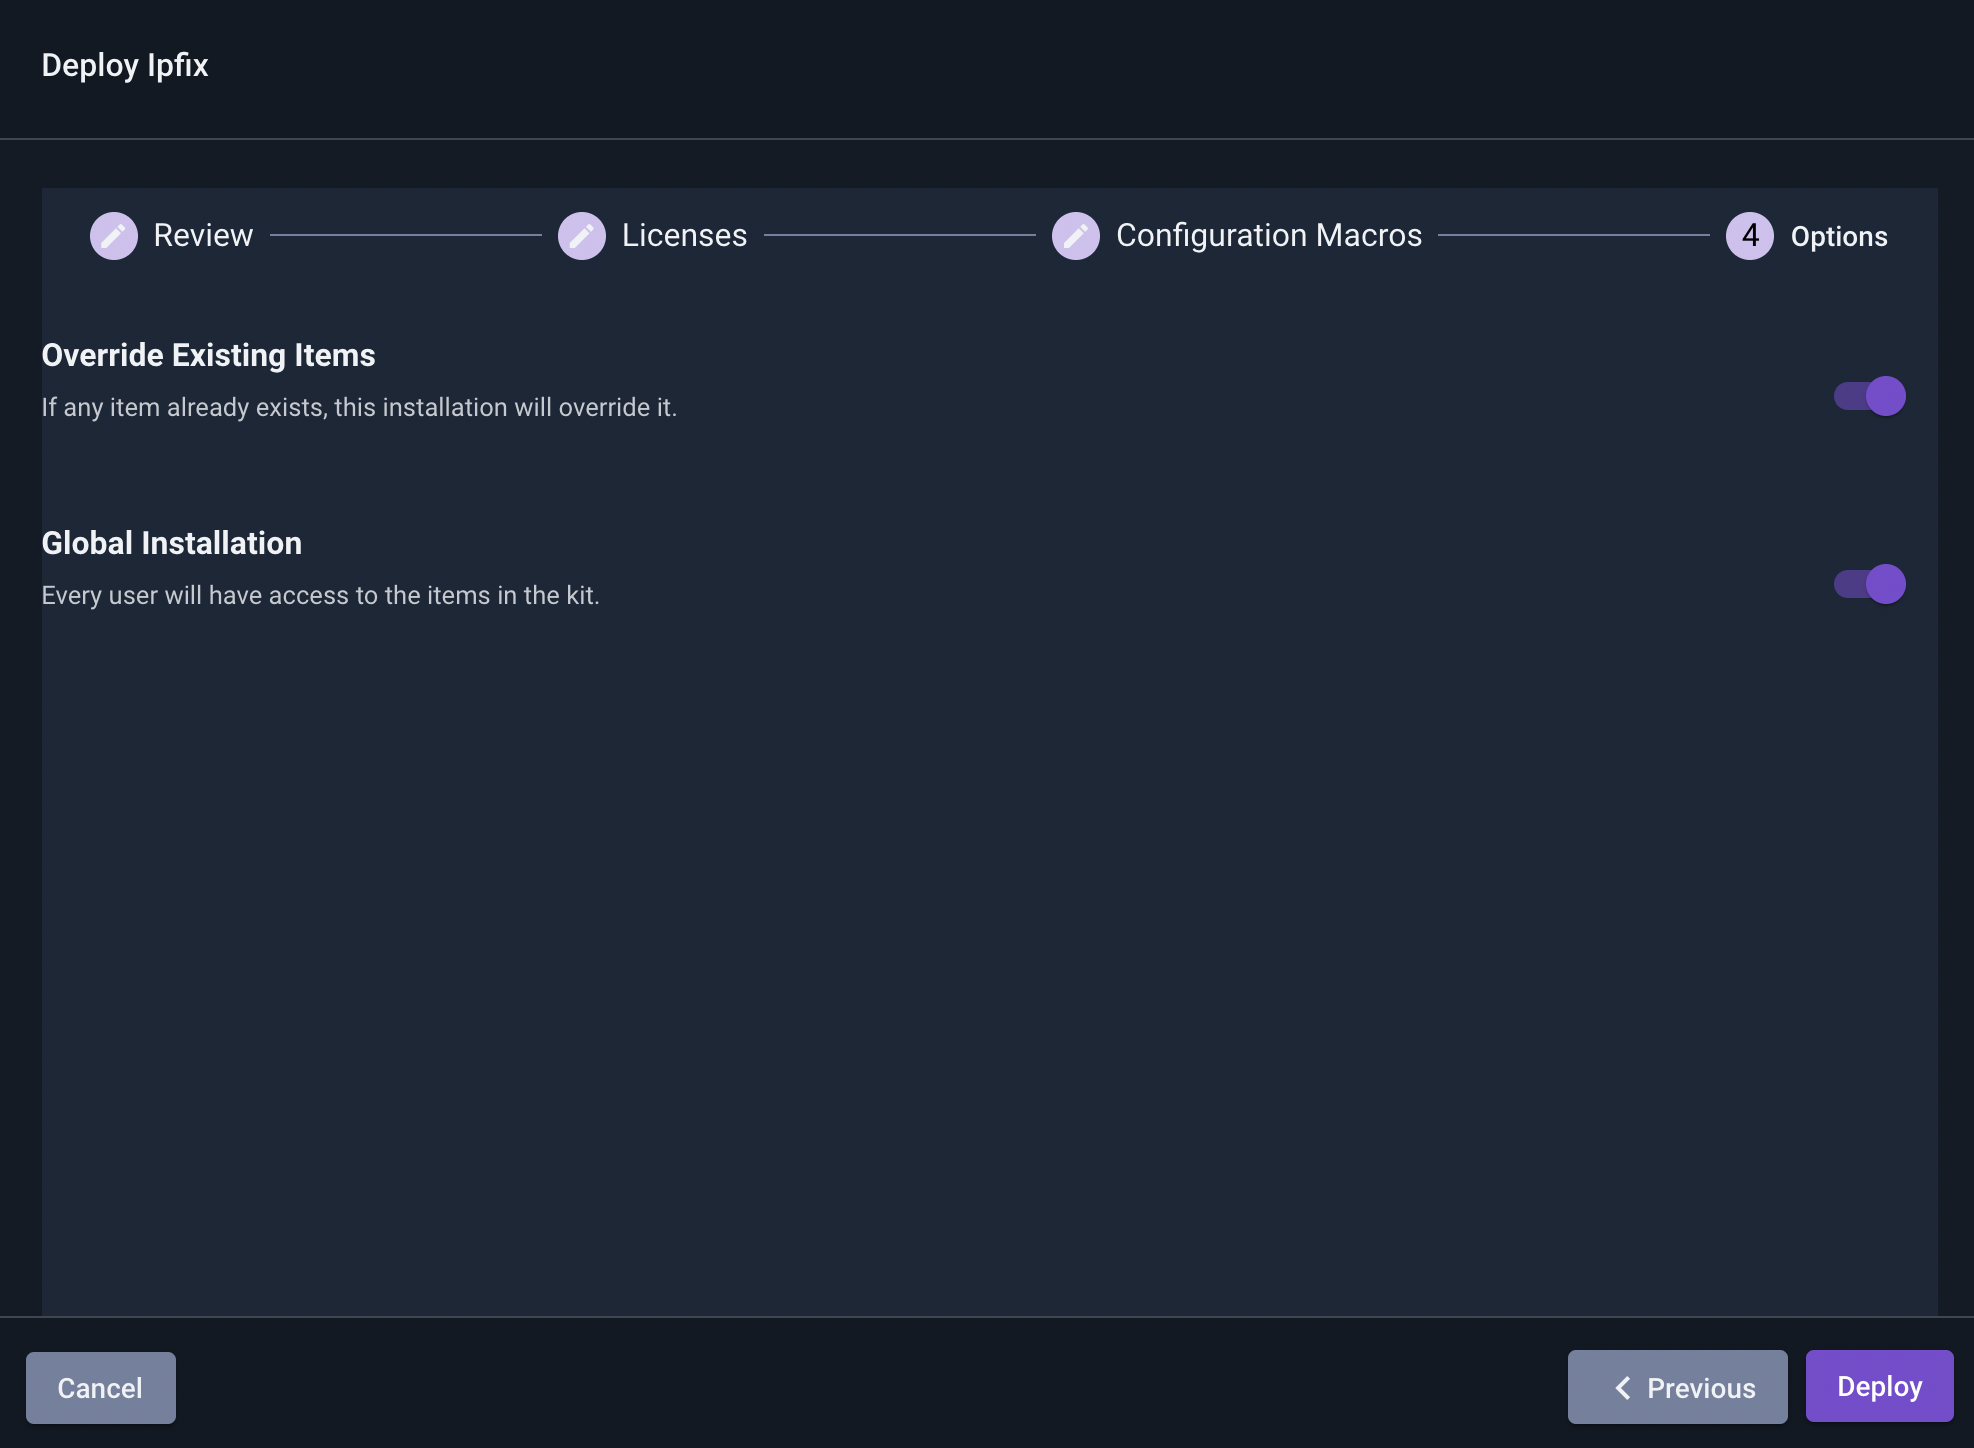
The final page of the wizard prompts for additional options. “Override Existing Items”, if checked, will overwrite any conflicting objects which may already exist on the system–for instance, if you have created a resource named “foo”, but the kit will also create a resource named “foo”. The “Group Access” dropdown allows you to optionally select a group which can see the contents of the kit. Admin users will also have the option to install the kit globally, meaning all users can see it.
When you click the “Deploy” button, the kit and any dependencies will be installed. This may take a minute or so, but eventually the kit will be listed as one of your installed kits.
Note
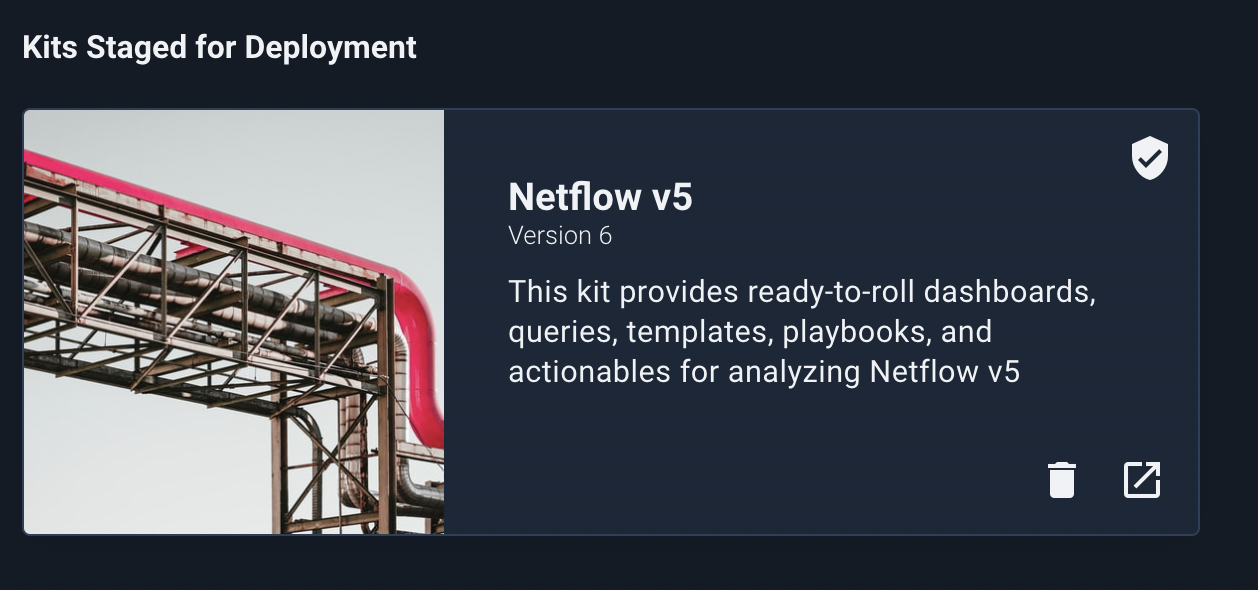
If you abort the installation wizard, the kit will not be installed, but the downloaded kit will be shown in the “My kits” page under the label “Kits Staged for Deployment”, as seen below. You can chose to delete the staged kit or restart the installation wizard.
Upgrading Kits#
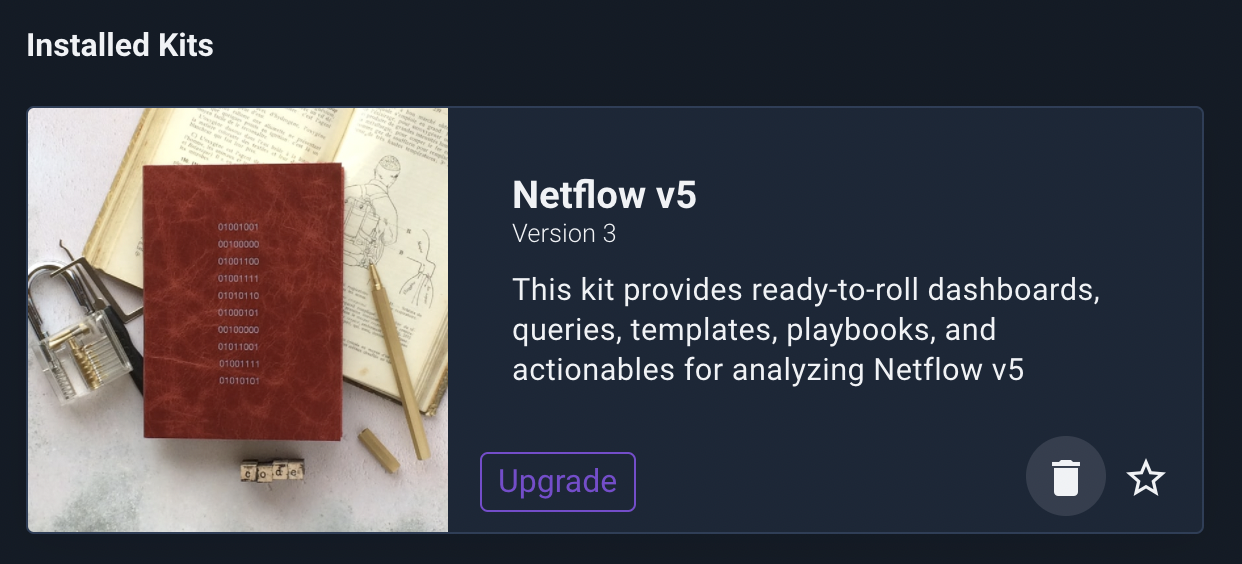
Gravwell will periodically push updates to the official kit server. When one of your installed kits has an update available, an “Upgrade” button will appear on that kit’s tile:
If there are no items which have been modified, the Backup step will not be shown. The rest of the wizard is identical to the installation wizard, although defaults such as group access should be already set for you.
Attention
Upgrading a kit to a new version involves the complete deletion of the previous version’s contents. Do not click the “Deploy” button at the end of the wizard until you are prepared for this to happen!
Uninstalling Kits#
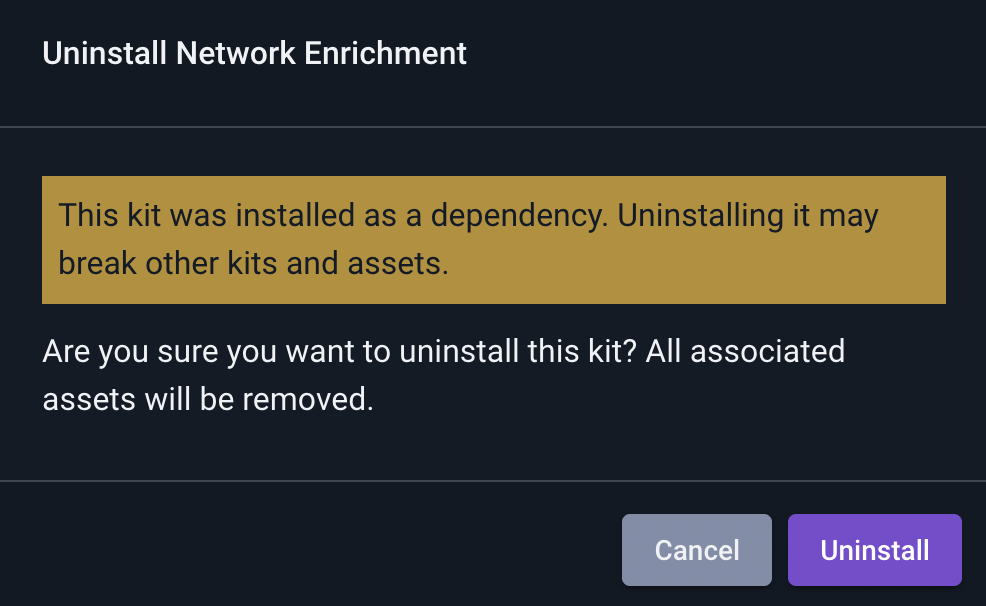
To remove an installed kit, enter kit management mode by clicking the “Manage Kits” button in the upper-right corner of the main kits page. Then select the trash can icon on the desired kit. A dialog will pop up for confirmation:
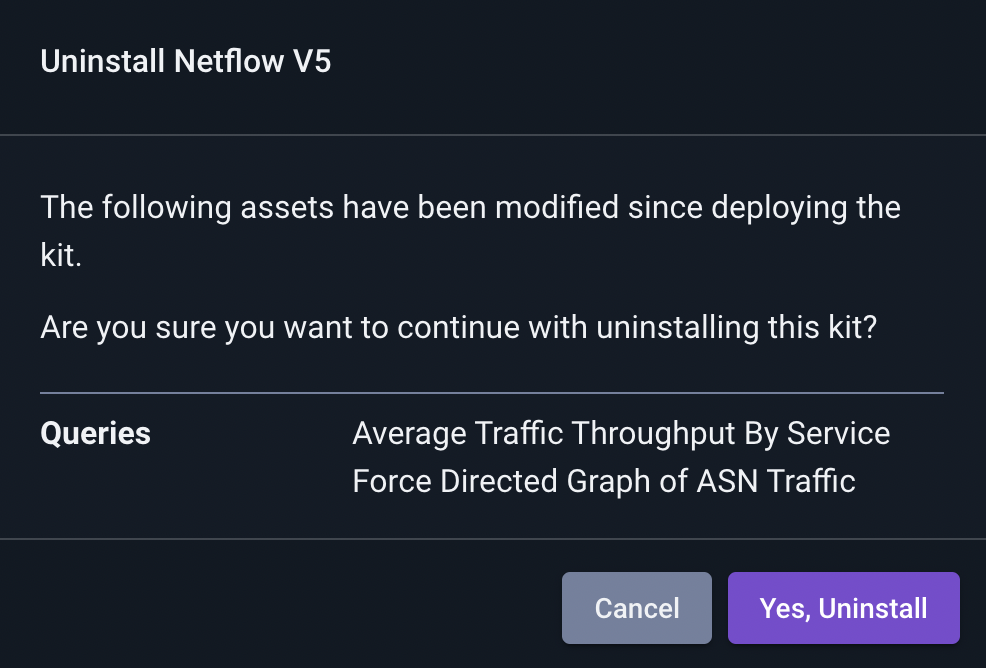
If you click “Uninstall”, the kit will be removed, unless you have manually changed any of the kit contents. If you have modified any of the kit items, you will see a second dialog warning you of this fact and allowing one last chance to abort the process:
Building Kits#
In addition to installing kits from the official kit repository, you can build and distribute your own kits based on existing assets in your Gravwell instance.
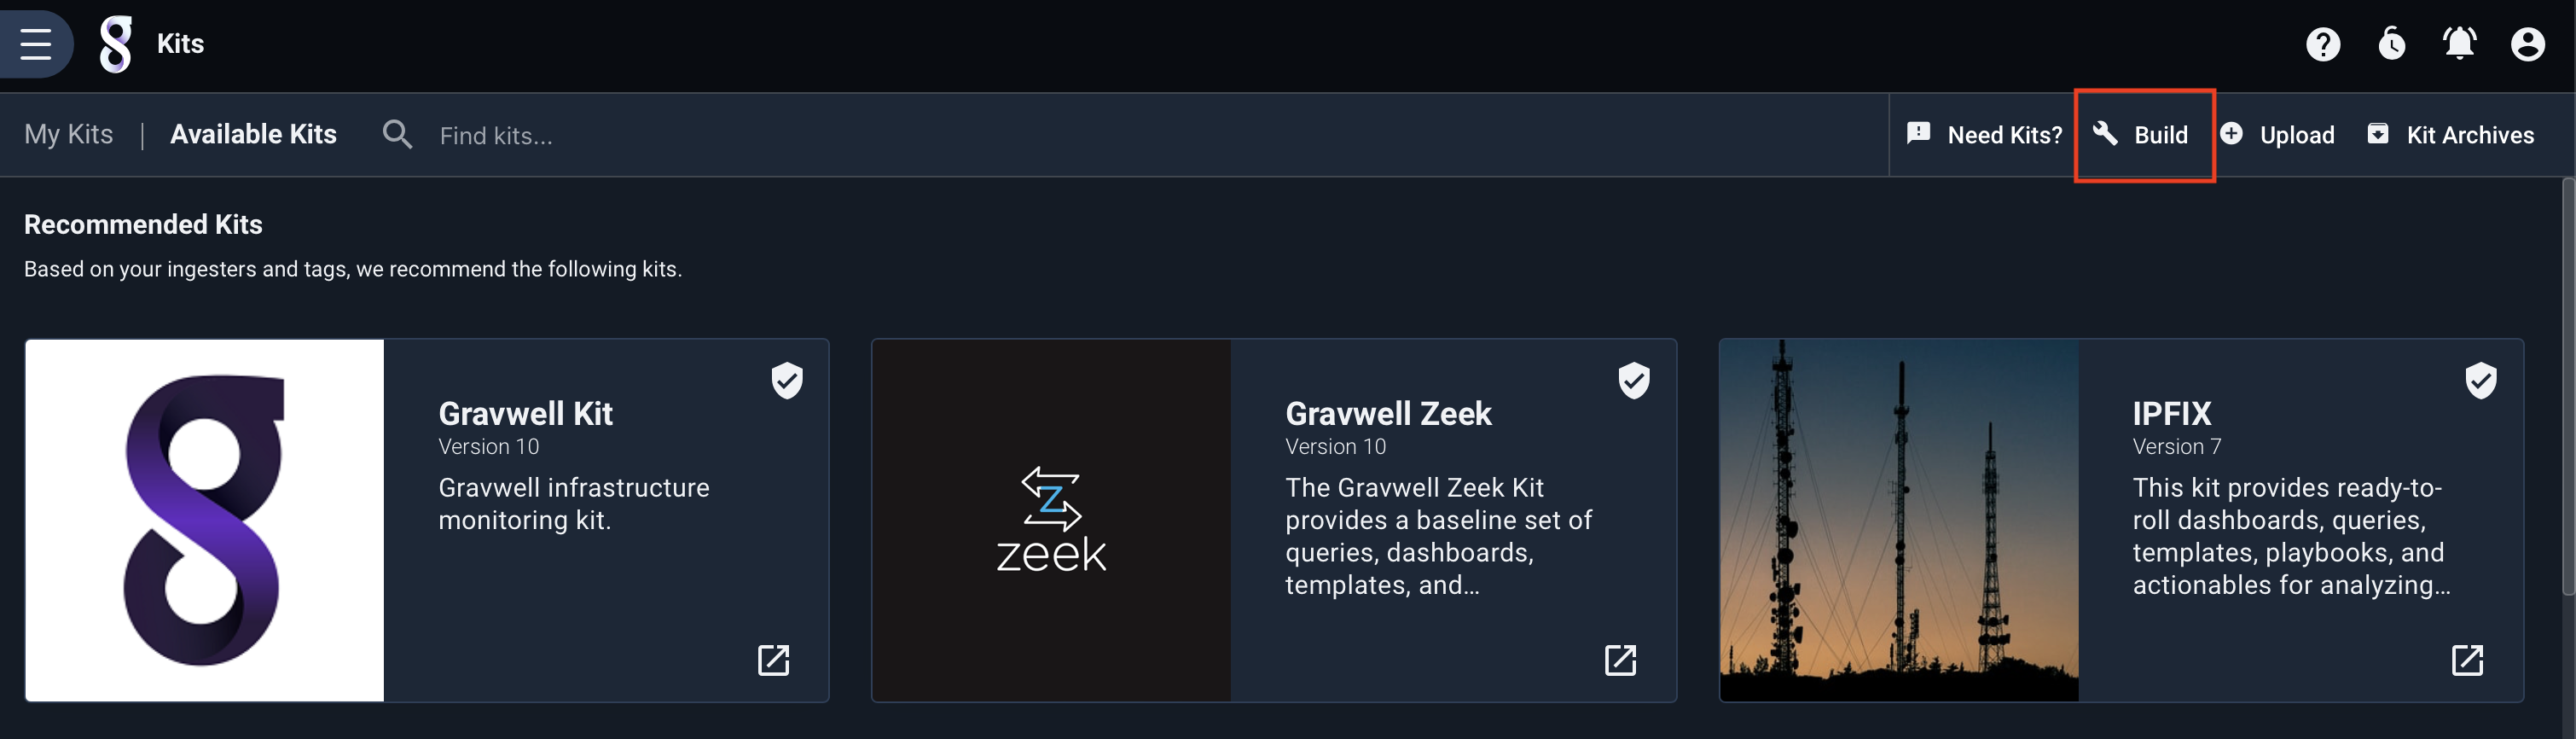
To begin building a kit, navigate to the kits menu and select the “Build” option.
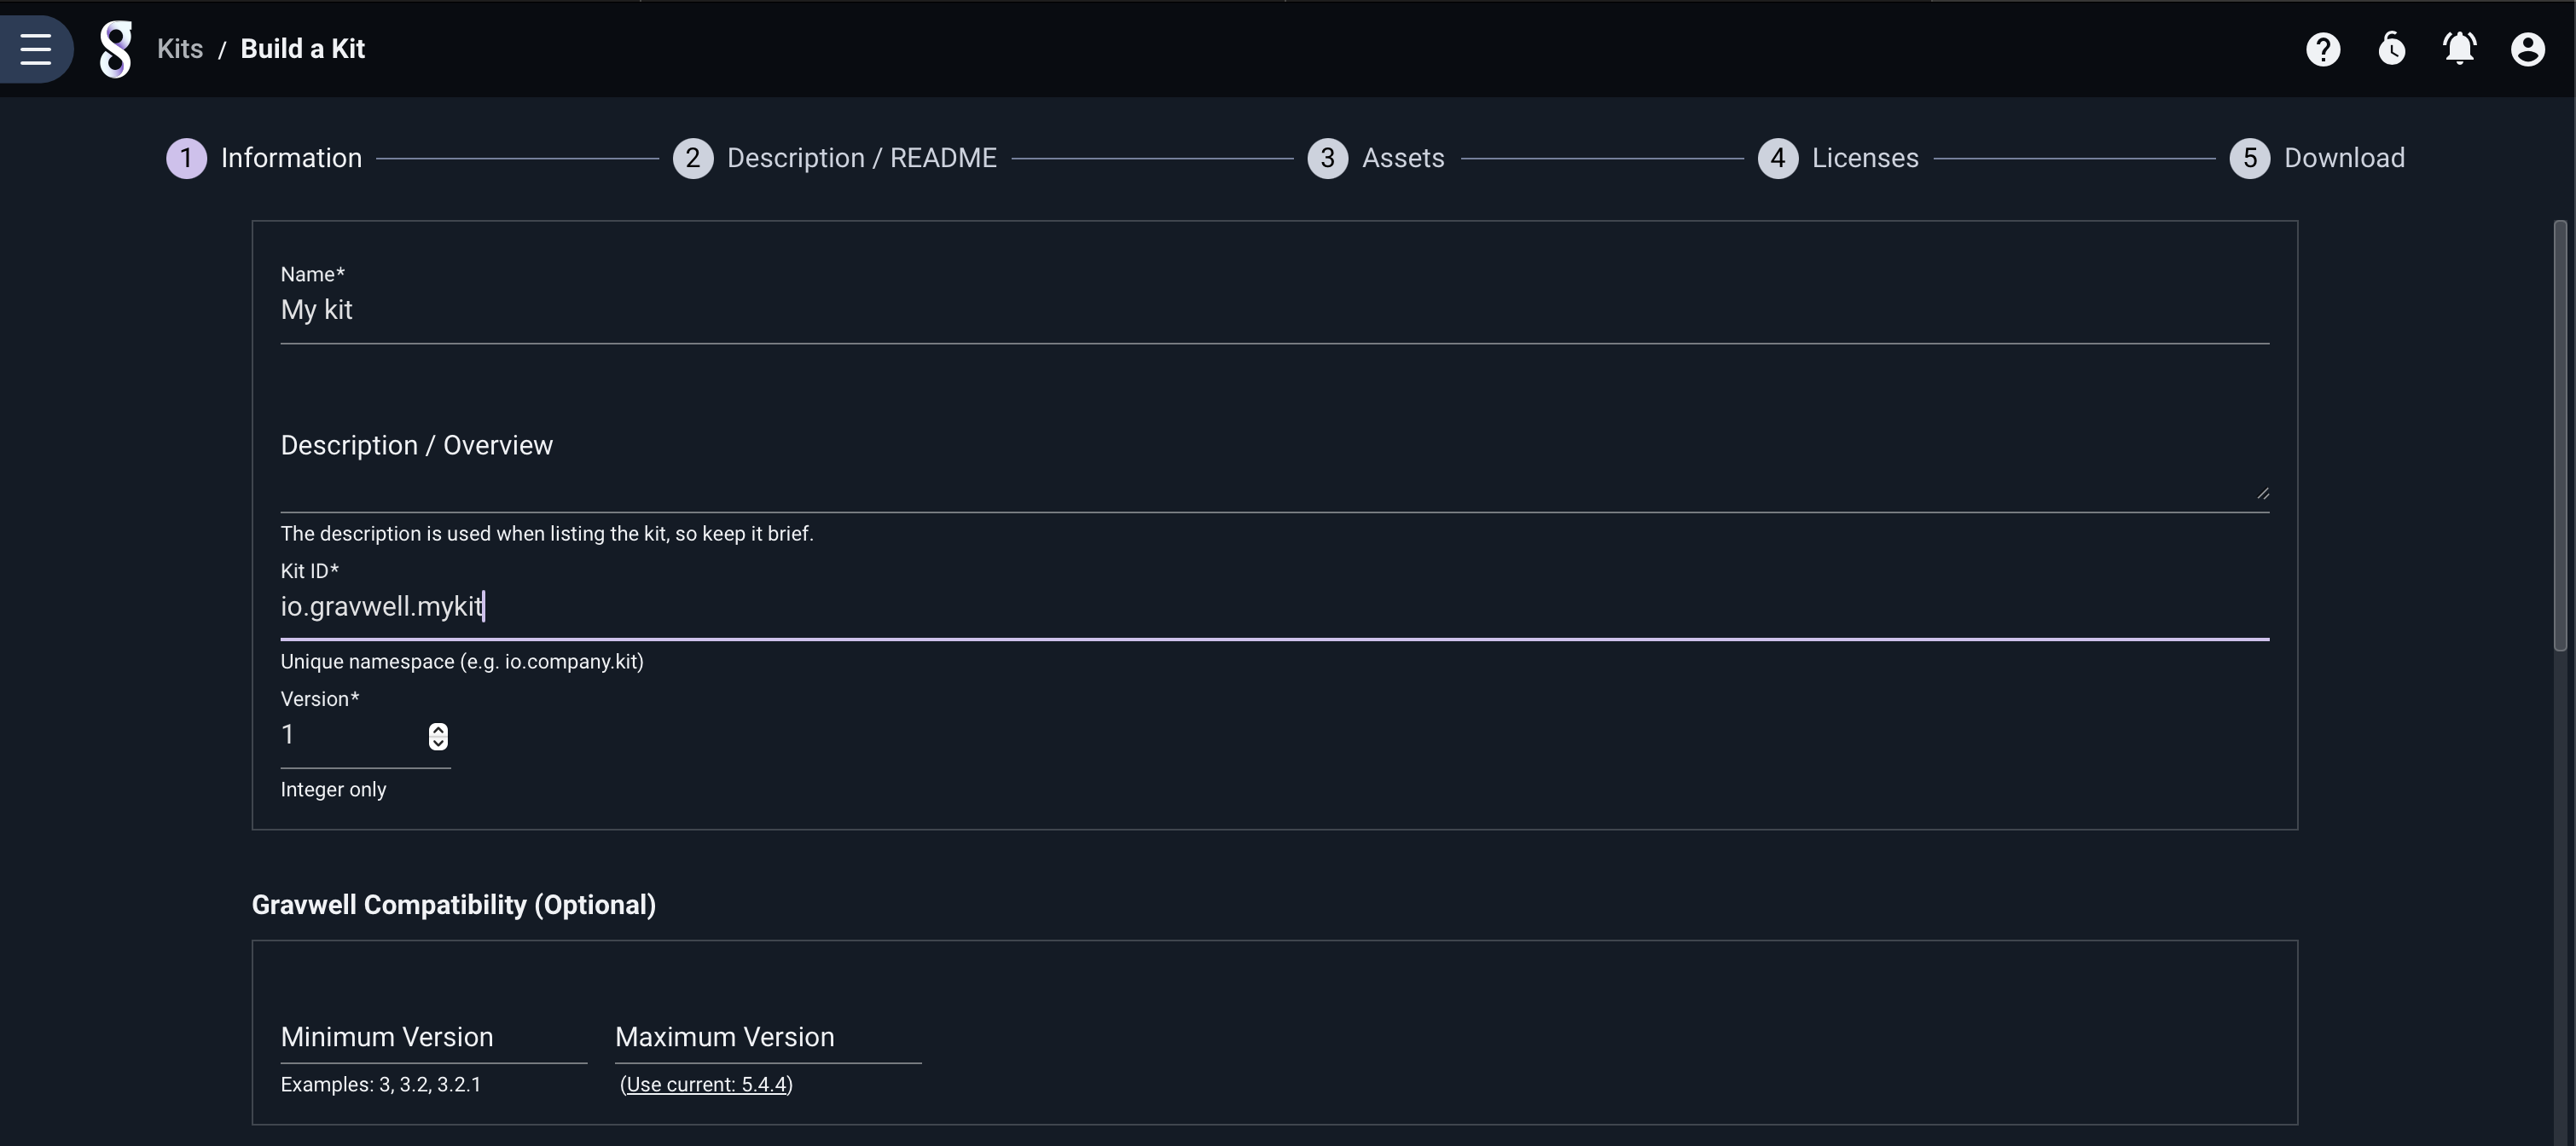
Kits can be configured to restrict installation to specific versions of Gravwell, and are themselves versioned. If you build multiple versions of the same kit, remember to increment the version so that Gravwell can correctly upgrade the kit.
The only required fields in the information menu are the name of the kit and the identifier. The identifier can be any unique string.

The next step requires that you provide a description of the kit. This description is shown in the kit tile when browsing and installing kits.
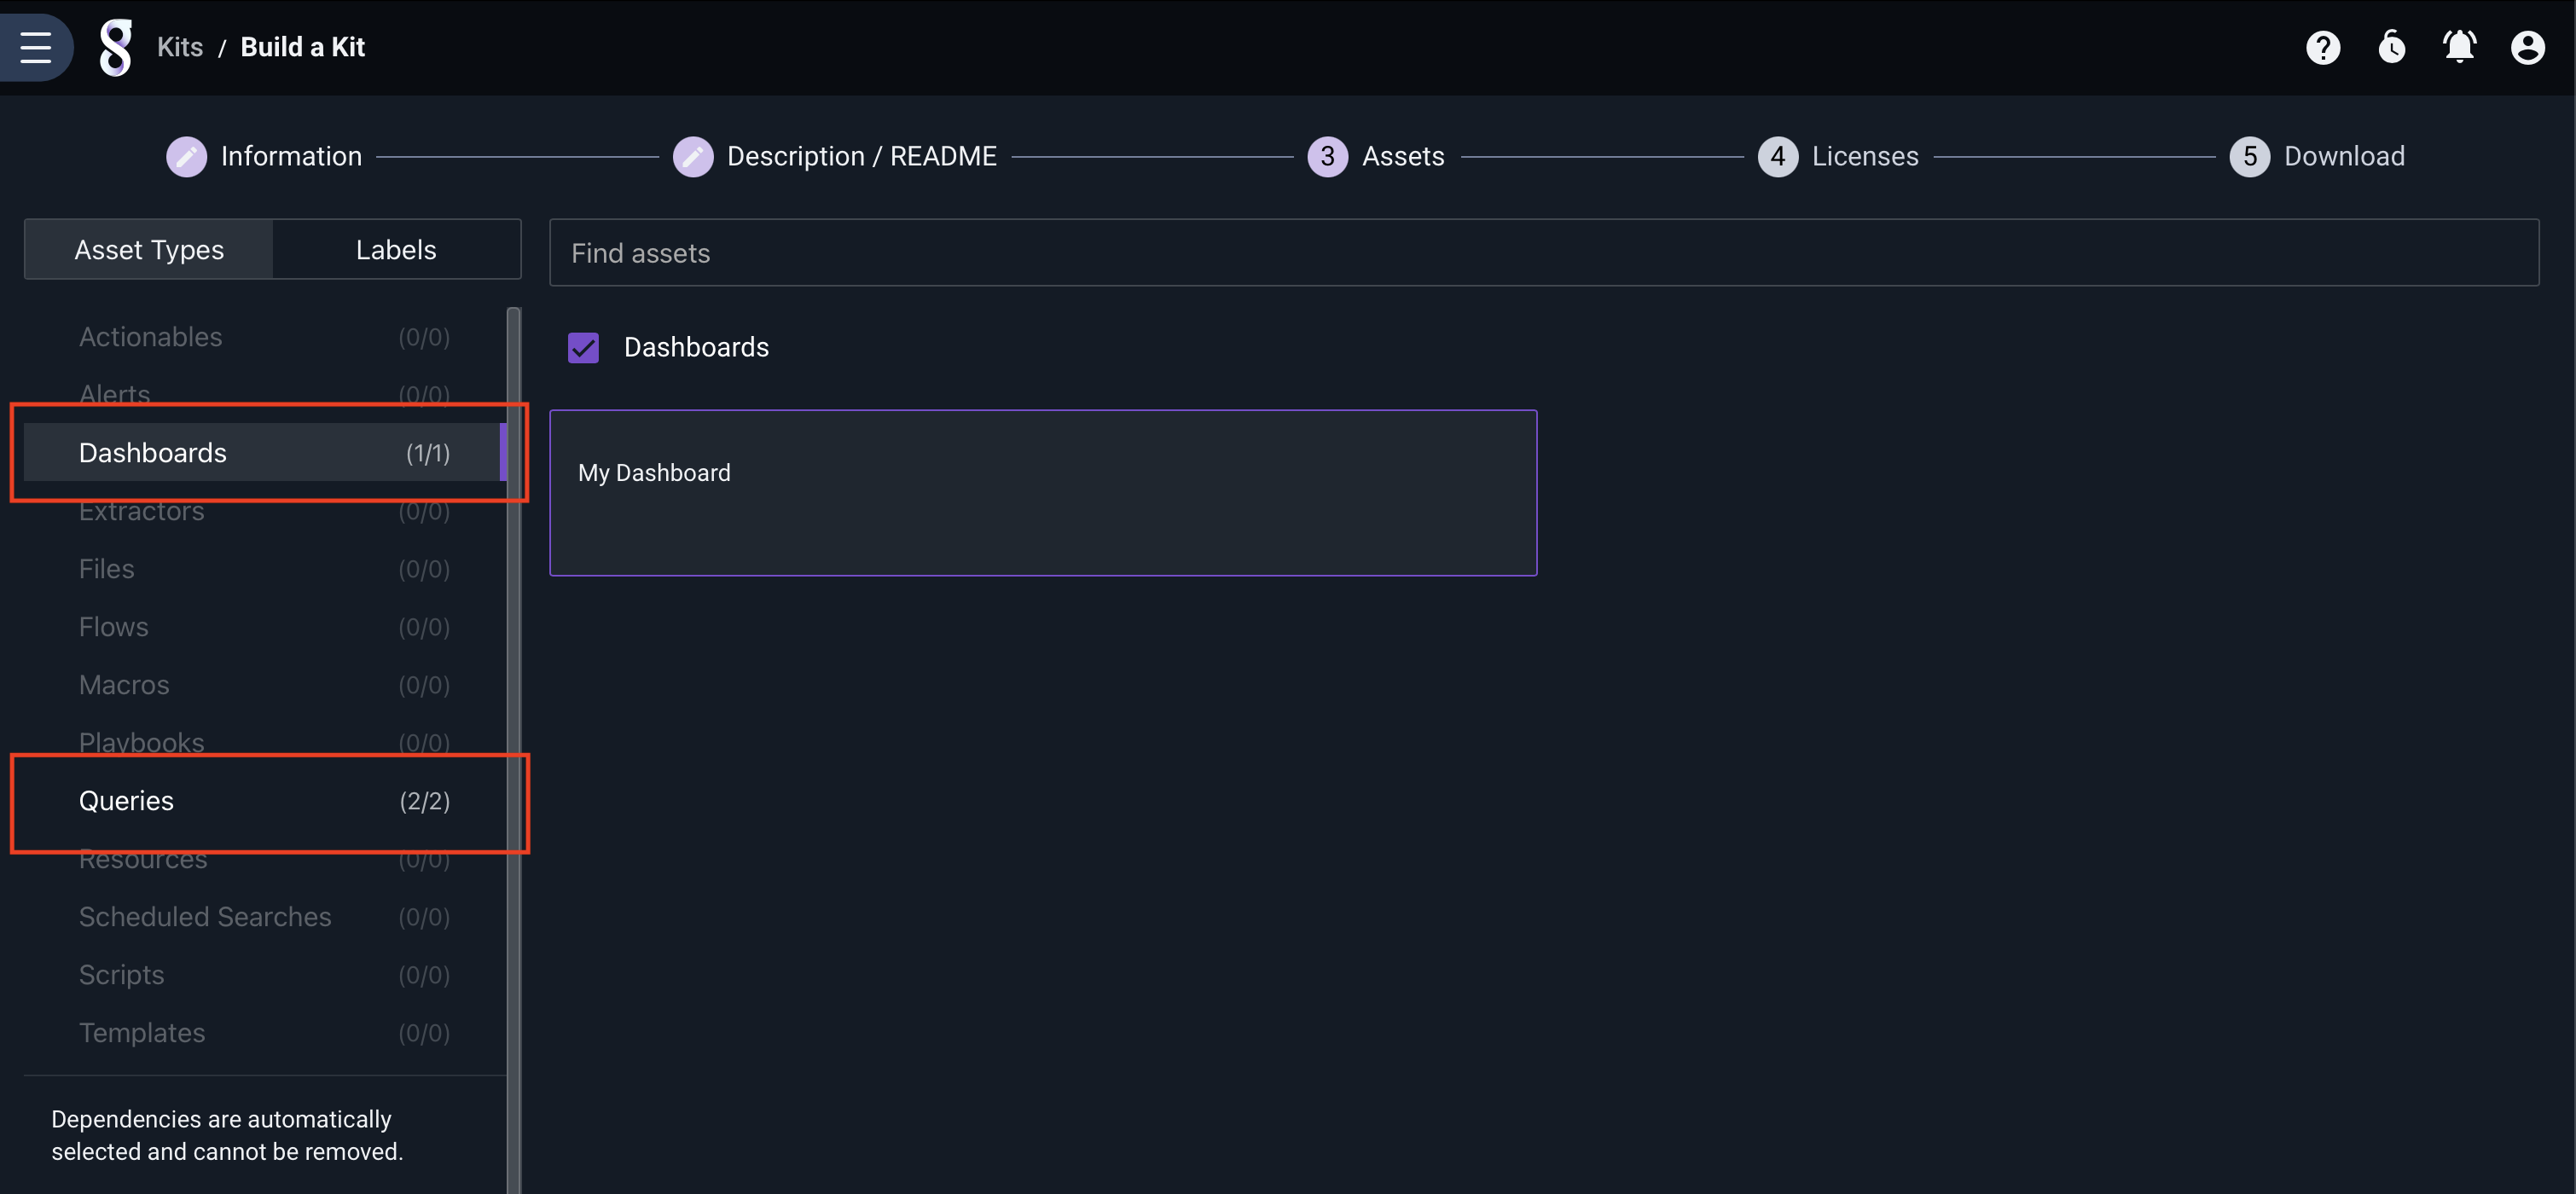
The assets menu allows you to select any assets that should be packaged into the kit. In this example, we select dashboards, and then select “My Dashboard”. The dashboard has two queries in it, which are automatically selected by the kit builder as dependencies.

In the licenses menu, you can provide one or more licenses that the user must agree to during kit install.
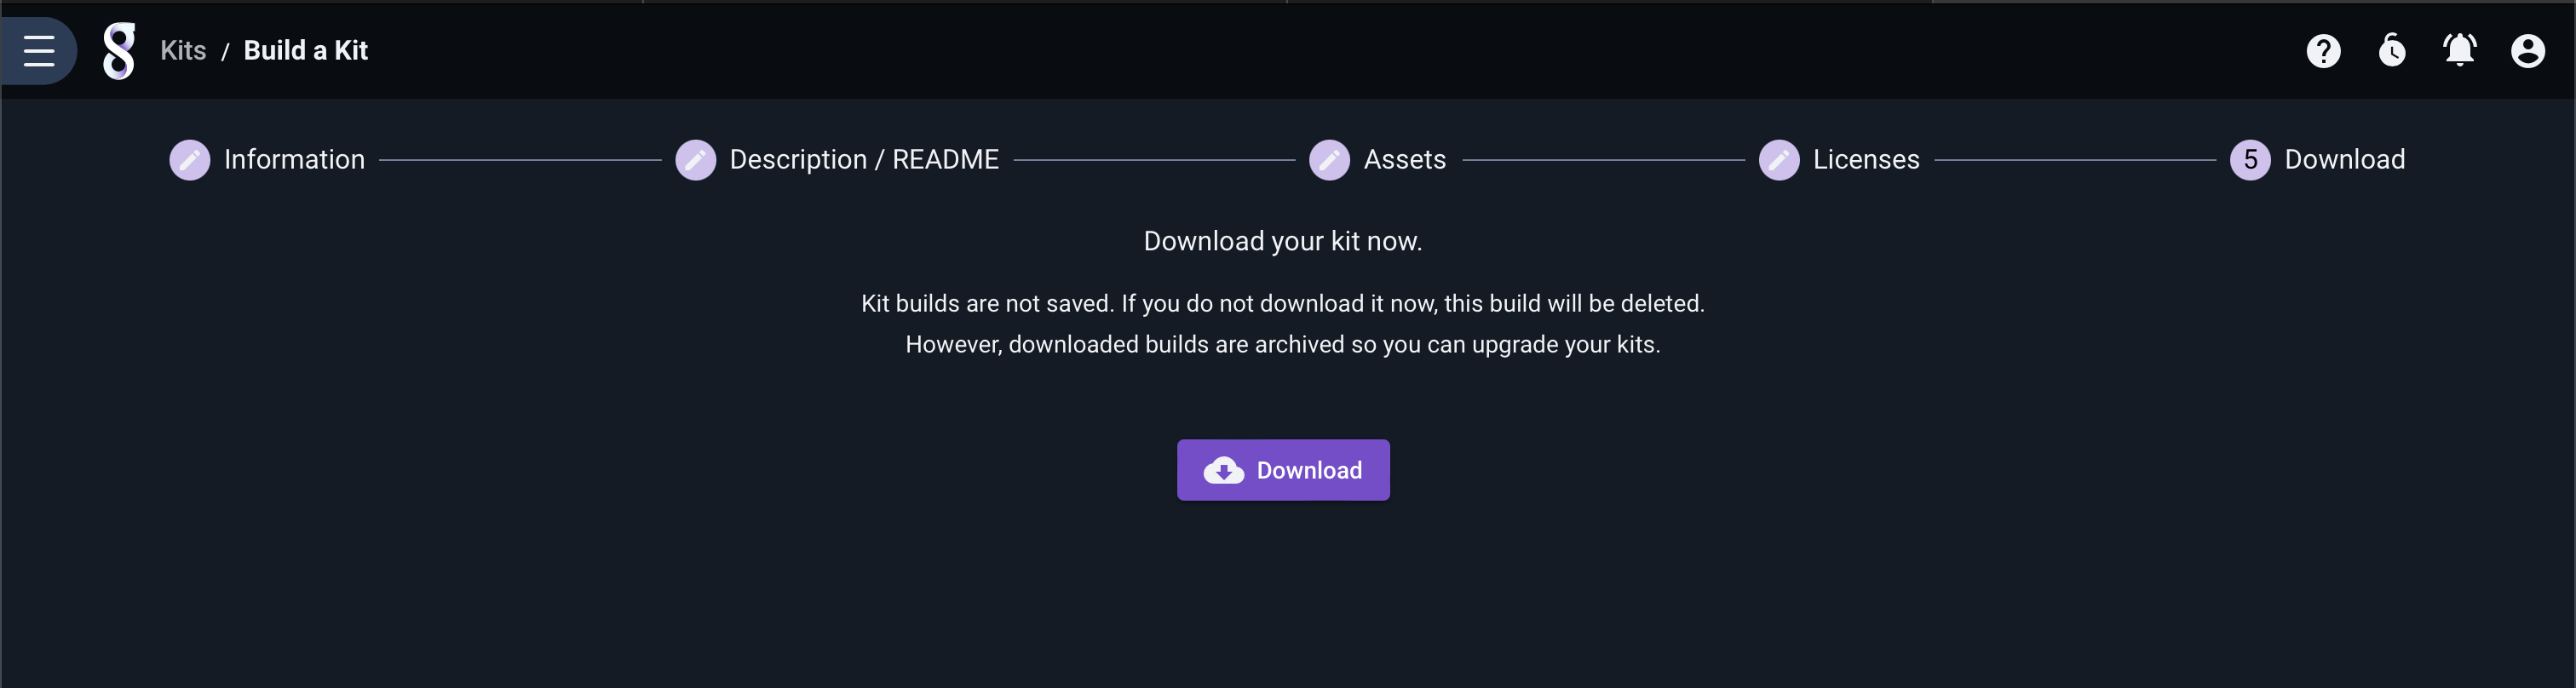
Finally, you can download the packaged kit and distribute it!
The Kit Server#
By default, Gravwell will check for available kits at https://kits.gravwell.io/kits/list. If you don’t see any kits listed in the “Available Kits” page, make sure you can hit that server from your Gravwell webserver. We are currently working on a toolset to allow self-hosted kit servers.
If you have curl and jq installed, you can use this command snippet to get a list of available kits:
curl "https://kits.gravwell.io/kits/list" | jq .[].ID