
The Gravwell GUI#
Most users will interact with Gravwell through the web GUI. This page describes a few high-level menus and interface concepts; the pages linked below go into detail on other topics.
GUI Introduction#
After logging in, you will by default be directed to the search page, shown below.
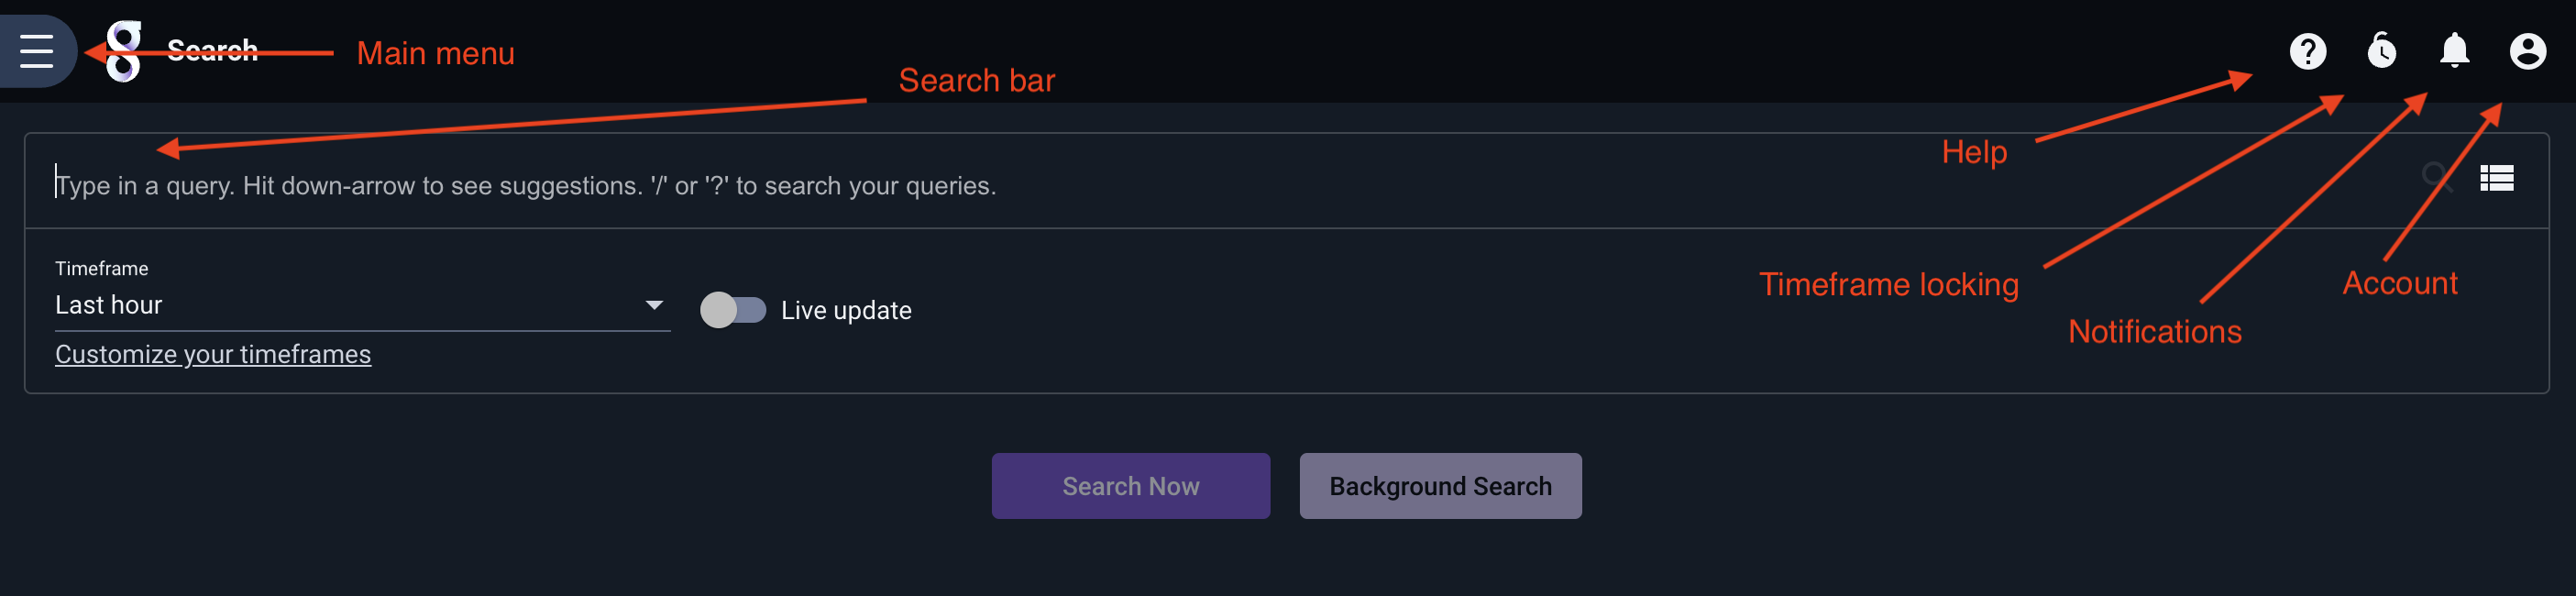
The icons along the top (labeled Main Menu, Help, Notifications, and User Profile) are visible at all times within the Gravwell GUI.
The Main Menu#
Clicking the “hamburger” menu in the upper left will open the Main Menu:
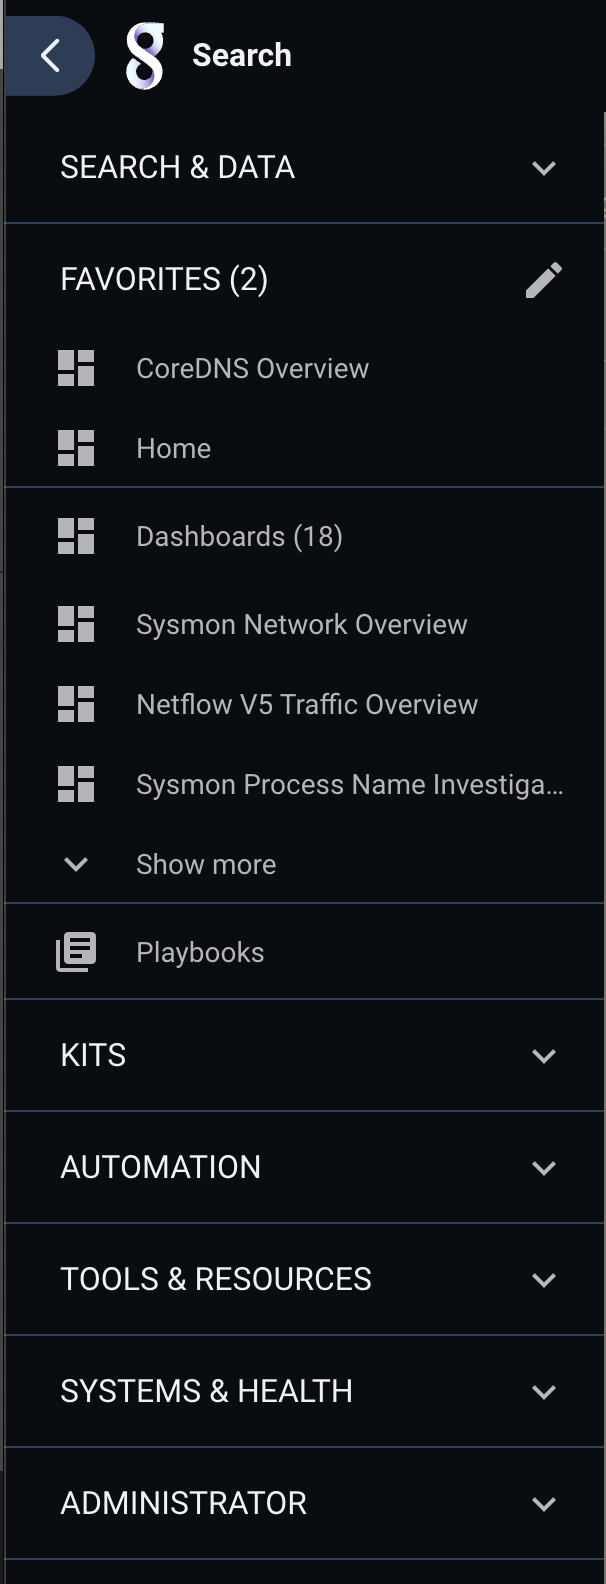
This menu is used to access all the primary functionalities of Gravwell, including dashboards, the query library, and playbooks. Note that several items within the menu are actually sub-menus, which can be expanded to show additional options:
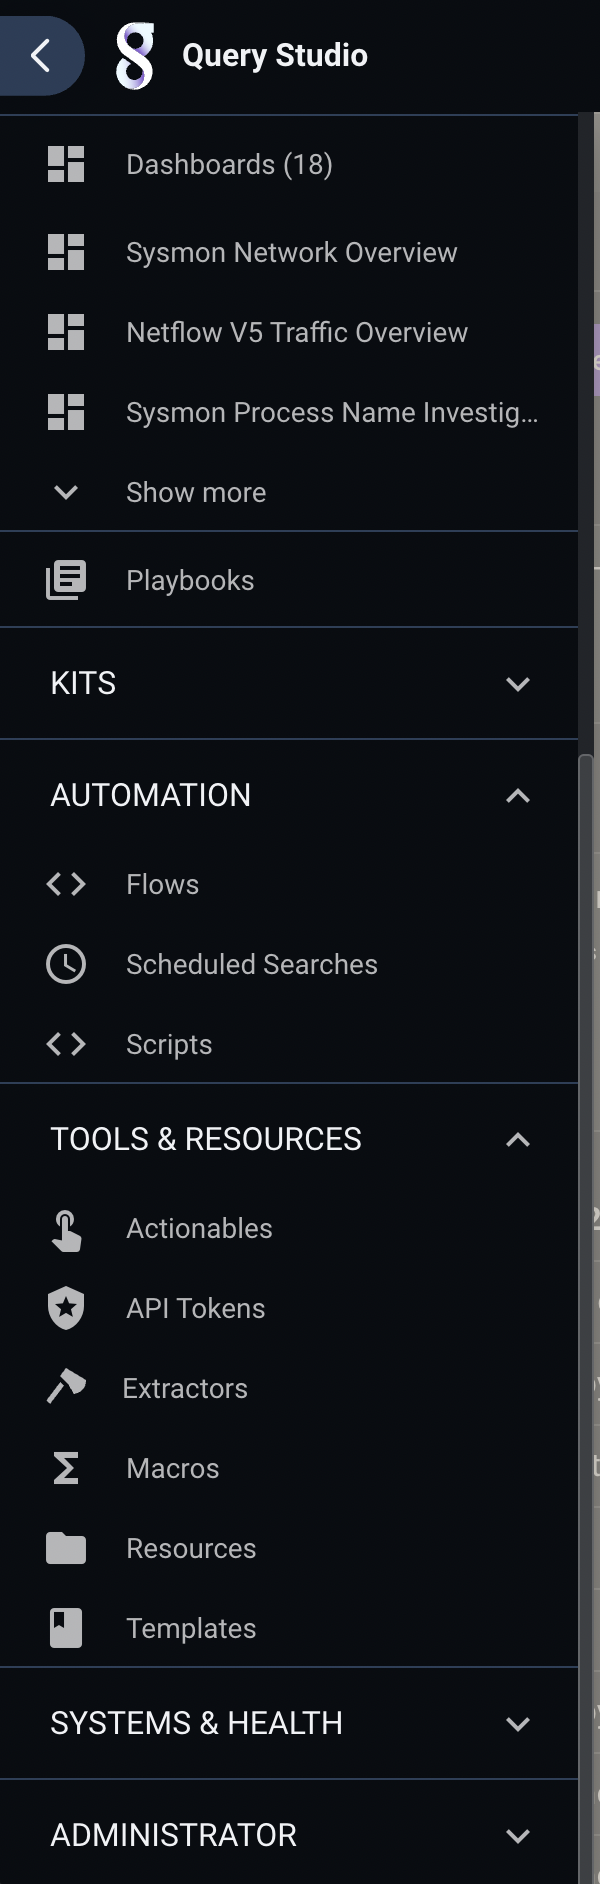
Items within these sub-menus will typically be used less frequently that the top-level items.
Note
These screenshots include an “Administrator” sub-menu, which contains admin-only management tools and is only visible to users flagged as administrators.
Notifications#
Clicking the bell-shaped Notifications icon in the upper right of the screen brings up the Notifications display:
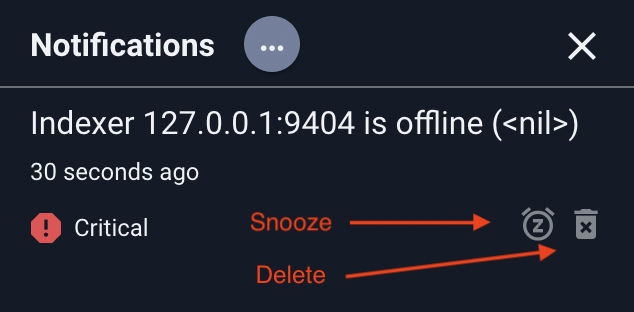
Clicking the “snooze” button on a notification will remove that notification from counter shown on the icon; this can be useful to prevent distractions.
Depending on the type of notification, clicking the “delete” icon may clear the notification entirely. Some notifications are persistent and cannot be deleted; some are system-wide and can only be deleted by the administrator, and some are targeted at the current user and can be deleted by that user. Note that there is no harm in clicking “delete” on a notification the user isn’t allowed to delete.
Critical notifications, such as an offline indexer, will change the notification bell into a warning sign:

User Preferences#
Selecting the User Profile icon in the upper right of the screen brings up a small drop-down menu:
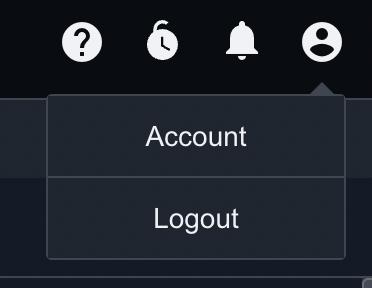
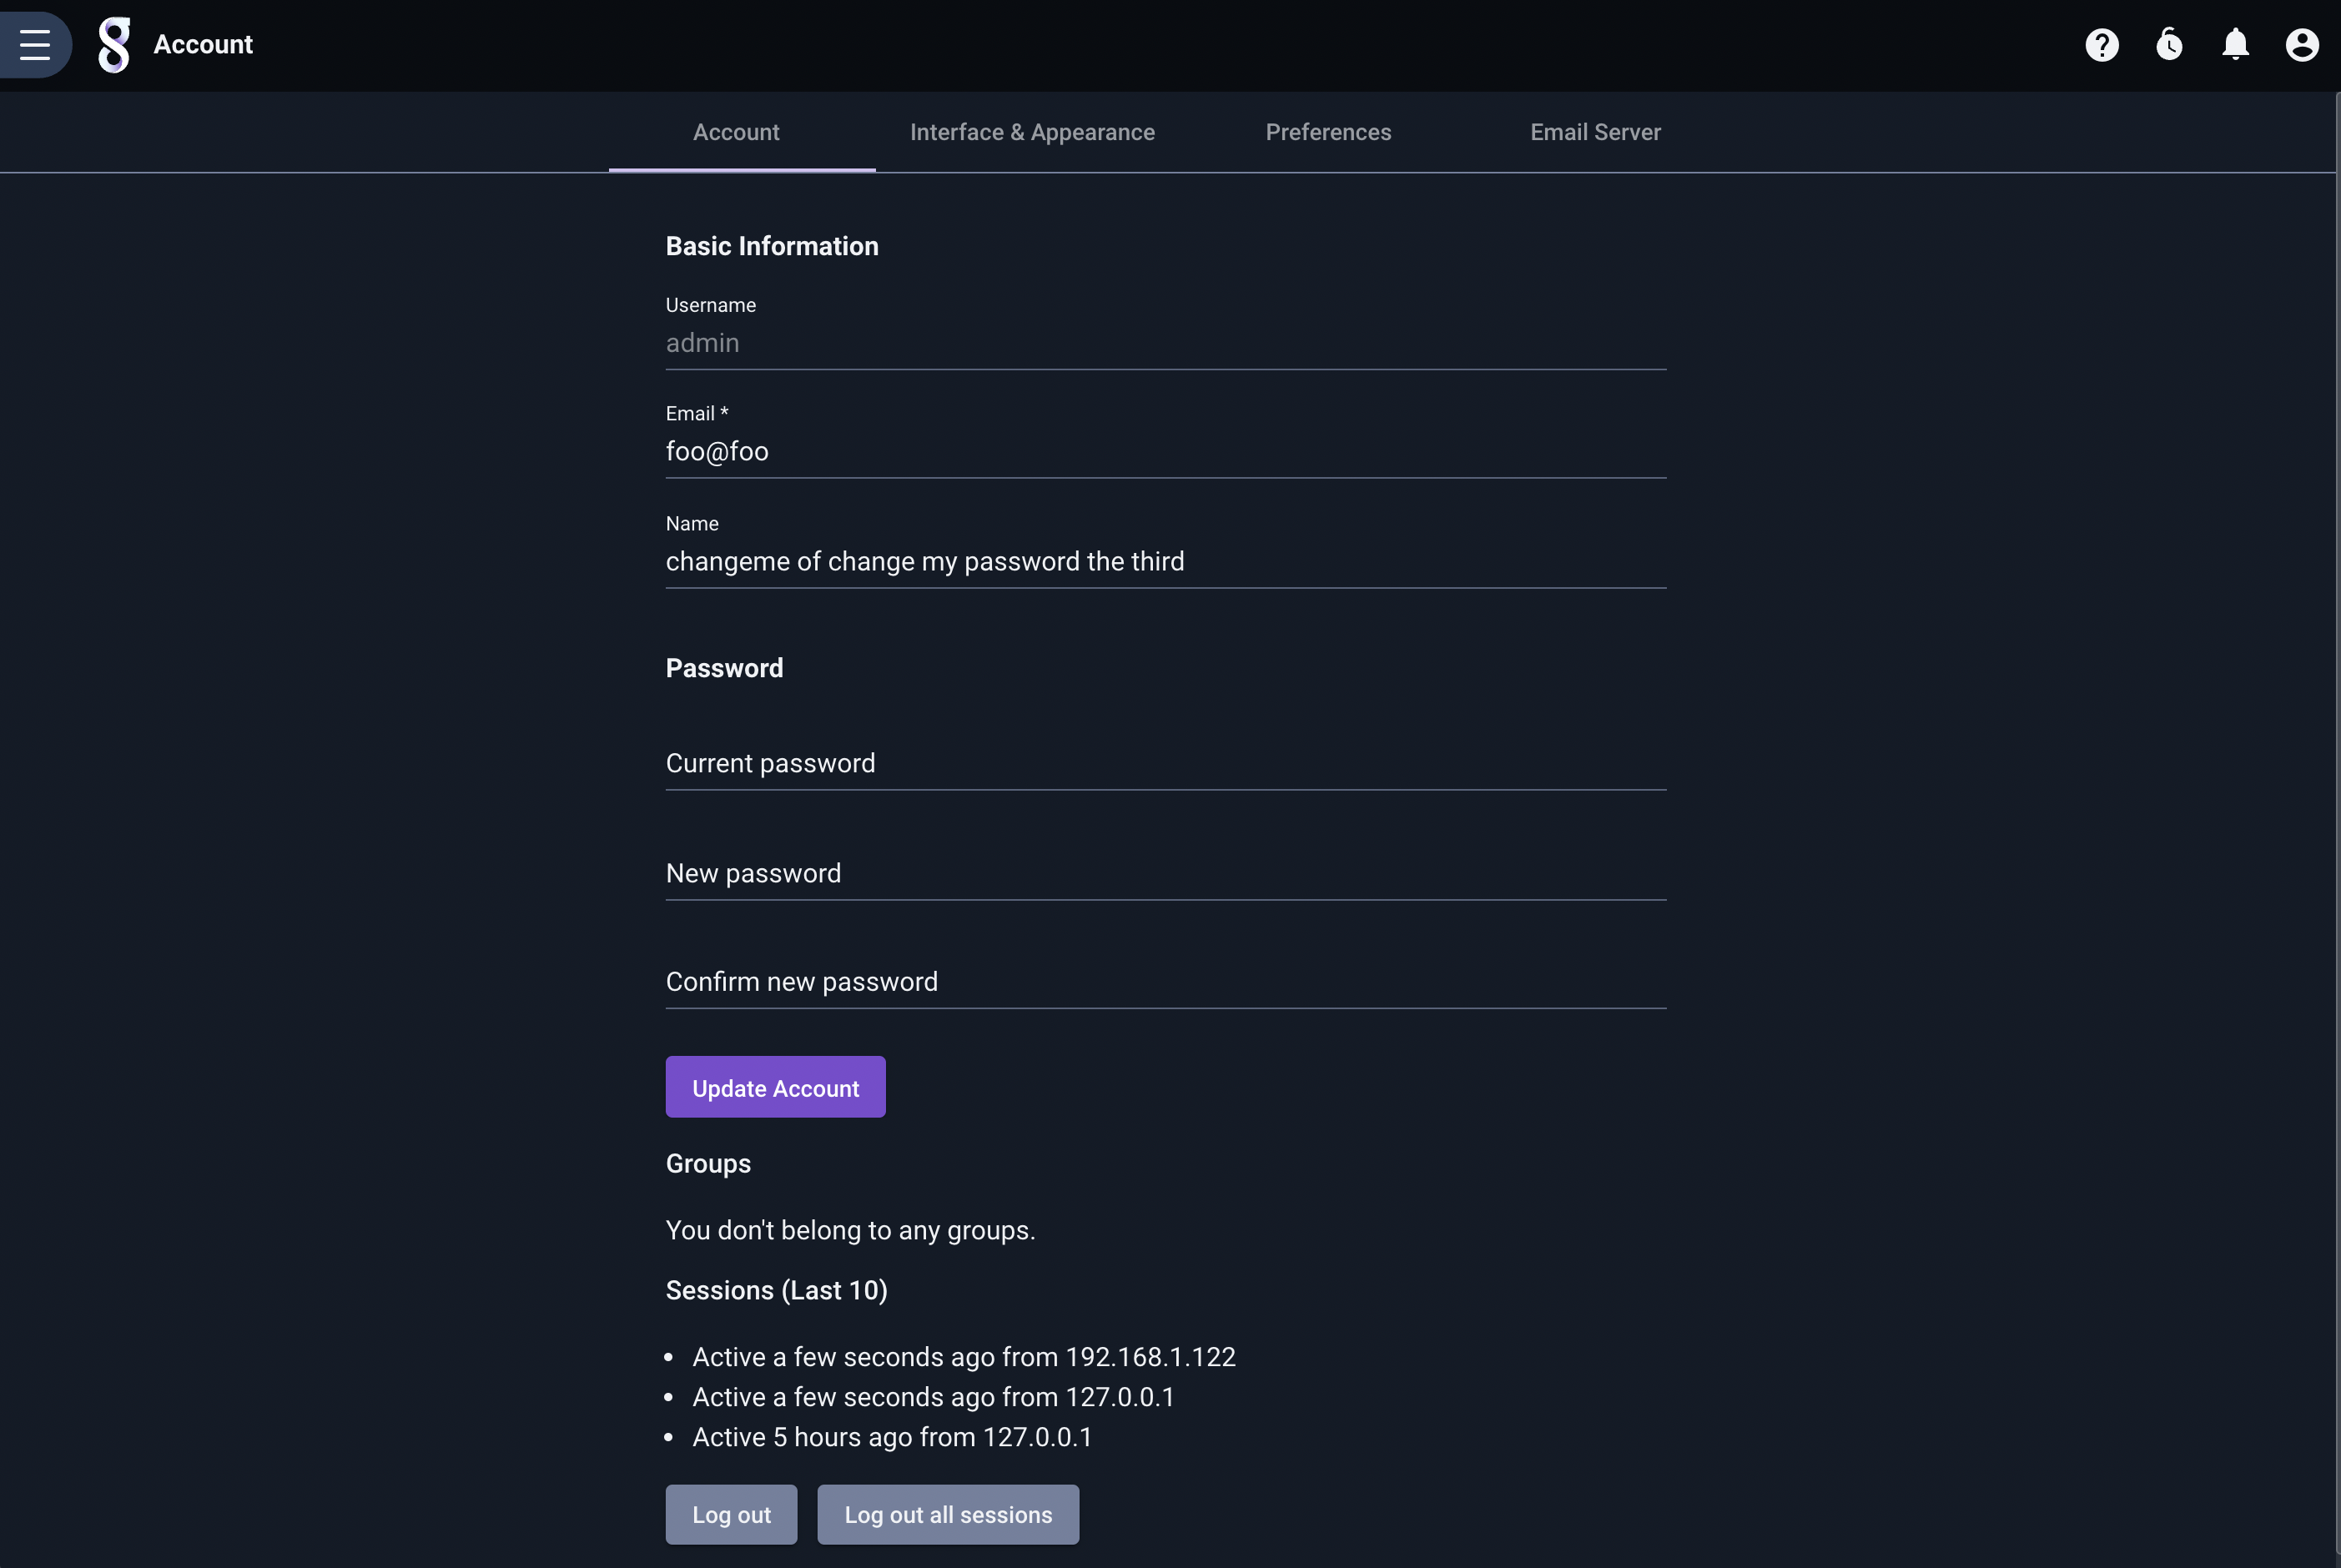
Account#
Selecting “Account” will open your preferences page, shown below. Here, you can change your email address, display name, or password; be sure to click the appropriate “Update” button after making changes! The “Log out” button at the bottom of the screen will kick all active sessions for your account, across all client machines.
Security#
The second tab, “Security”, is where you can configure Multi-Factor Authentication (MFA). Complete documentation is available on the MFA page.
Preferences#
The third tab, “Preferences”, allows you to change some default behaviors of Gravwell.
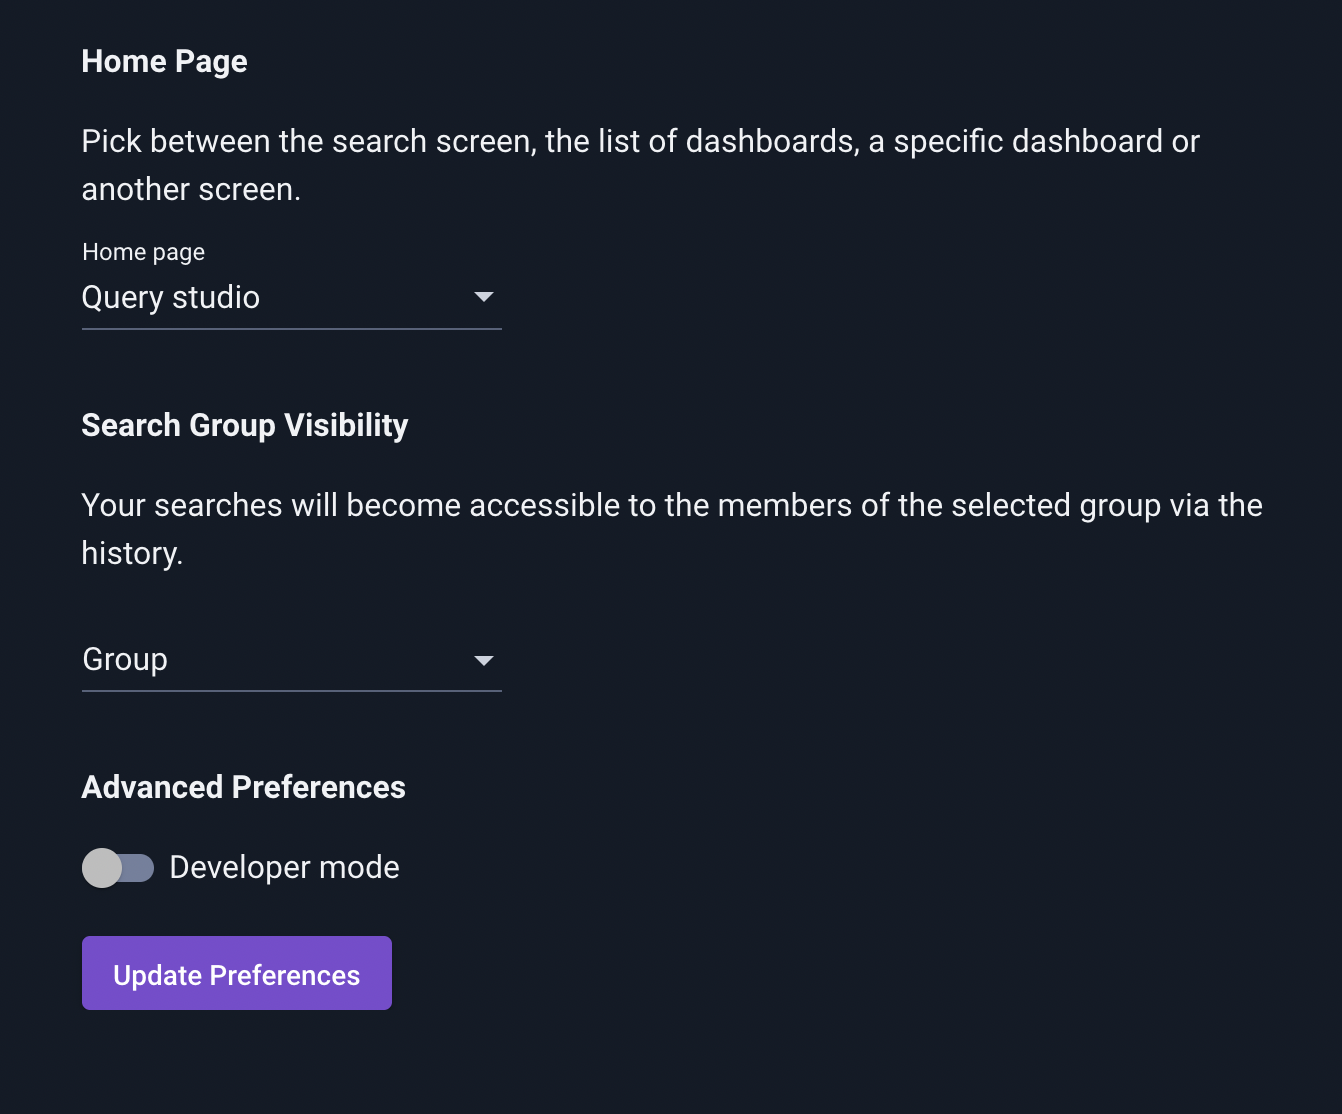
The “Home Page” dropdown menu selects which page will be displayed after logging in or clicking the Gravwell icon next to the main menu. By default, the new search page is shown, but you can chose to be shown a list of dashboards, kits, or playbooks instead.
The “Left menu default visibility” dropdown sets the default visibility of the navigation menu.
The “Interface theme” dropdown is of particular interest, as it selects a GUI-wide color scheme (including the ever-popular dark modes).
The “24-Hour format” toggle enables users to change the time format to 24-hour instead of the the 12-hour AM/PM format.
The “Chart theme” dropdown selects different color palettes which will be used when drawing charts.
The “Point-to-point map theme” dropdown selects the color theme to use with point-to-point maps.
The “Editor theme” & “Font size” options control the appearance of Gravwell’s built-in text editor, which is used to create automation scripts and in a few other places.
The “Search Group Visibility” option allows you to share the results of all searches with a given group; this can be a convenient way to collaborate. In the screenshot, the user has selected the group named “foo”; all members of that group will have access to the searches this user runs in the future.
The “Advanced Preferences” section can be ignored by most users. Selecting “Developer mode” enables manual editing of JSON preferences (see this page for more information), while toggling “Experimental Features” will enable the Experimental Features section in the main menu.
Email Server#
The fourth tab, “Email Server”, is extremely important for users who intend to use Gravwell to send automated email alerts. Complete documentation is available on the Email Configuration page.
Capabilities#
The last tab shows a list of granted capabilities when Capability Based Access Control is enabled. Complete documentation is available on the CBAC page.